Open Ticket
  +373 79 600002
  Telegram Live Chat
  F.A.Q
F.A.Q  English
 Русский
  Română
  Deutsch
  Français
  Türkçe
  Español
  Português
  Українська
  български
  Polski
  Indonesia
  中文 (中国)






























































































































 on All Hosting Services






Omarchy First Things to Do: A Post-Install Checklist
You have reached the Omarchy desktop. Everything looks deliberate, but how do you open a terminal, find a setting, or undo a mistake? Omarchy is an opinionated Linux desktop built on Arch and powered by Hyprland—the software that arranges your windows. Your first job is to learn the supplied environment, not rebuild it.

This post-install checklist follows three stages: get oriented, get your everyday tools working, then add only what you need. Installation is already complete. These menu-first instructions draw on documentation.
For your first session: Follow the essentials in sections 1–3, 6, and 7. Use sections 4–5 if you need an app or want to practice organizing windows. The readiness checklist after section 7 marks your stopping point; sections 8–10 are optional follow-ups, not unfinished setup.
Note: This guide targets Omarchy 4, based on live documentation researched October 12, 2026. Details may change. Omarchy 3 users should follow the preserved legacy manual.
1. Learn the menu and your escape-route shortcuts
Priority: Essential
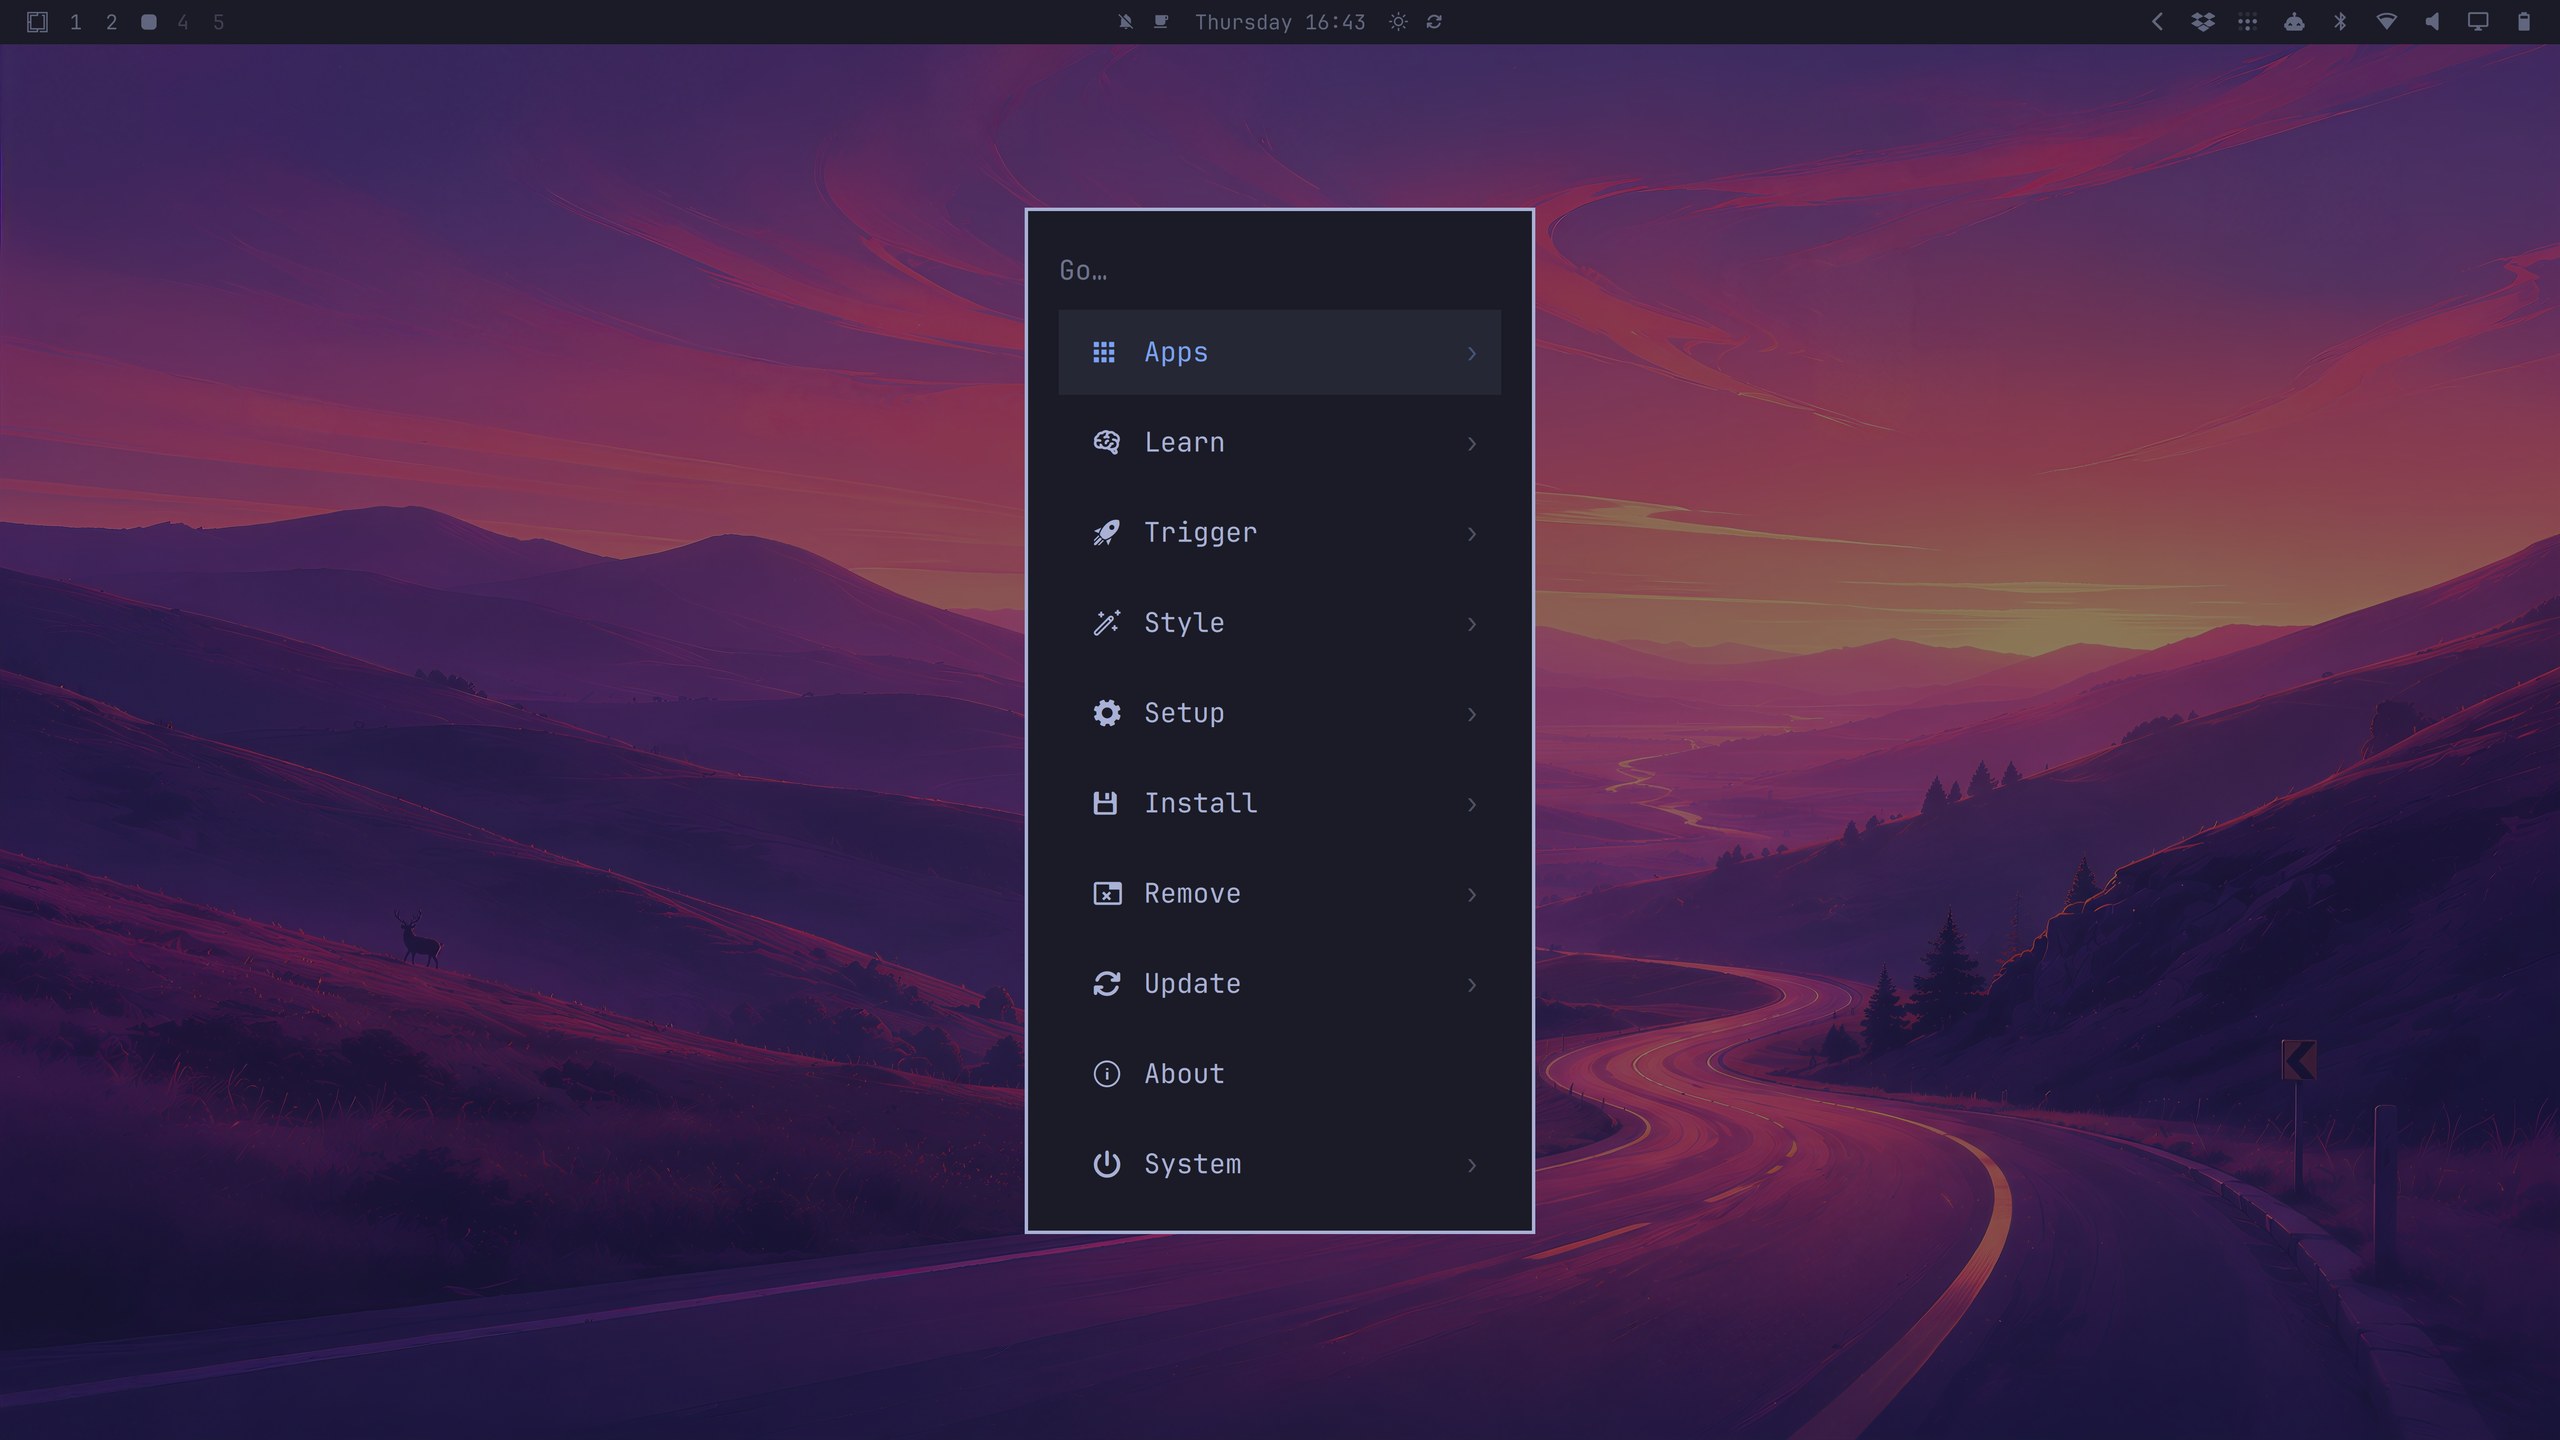
Finding the controls comes before changing them. Super usually means the Windows or Command key; Return means Enter. Press Super + Space and inspect Setup, Update, Install, Style, and Trigger without changing anything. Start with these seven documented shortcuts:
| Action | Default shortcut |
|---|---|
| ☰ Open Omarchy menu | Super + Space |
| ⌨️ View keybindings | Super + K |
| 💻 Open terminal | Super + Return |
| 🌐 Open browser | Super + Shift + Return |
| 📁 Open file manager | Super + Shift + F |
| ❌ Close focused window | Super + W |
| 🔒 Lock workstation | Super + Ctrl + L |
Clicking the logo or bar icons works too; Escape closes bar panels. Keyboard-first does not mean mouse-forbidden. If bindings differ, trust your installed Super + K reference. Close only a disposable window, and confirm your password and keyboard layout before trying the lock. You are oriented once you can launch a tool, find help, and close safely.
To check your installed version, optionally run this in a terminal:
omarchy-version
The helper reports the package version, or possibly dev, without upgrading anything. If it fails, do not assume a version. If it reports Omarchy 3, follow the legacy-manual note above.
2. Check typing, displays, connectivity, and sound
Priority: Essential for hardware you actually use
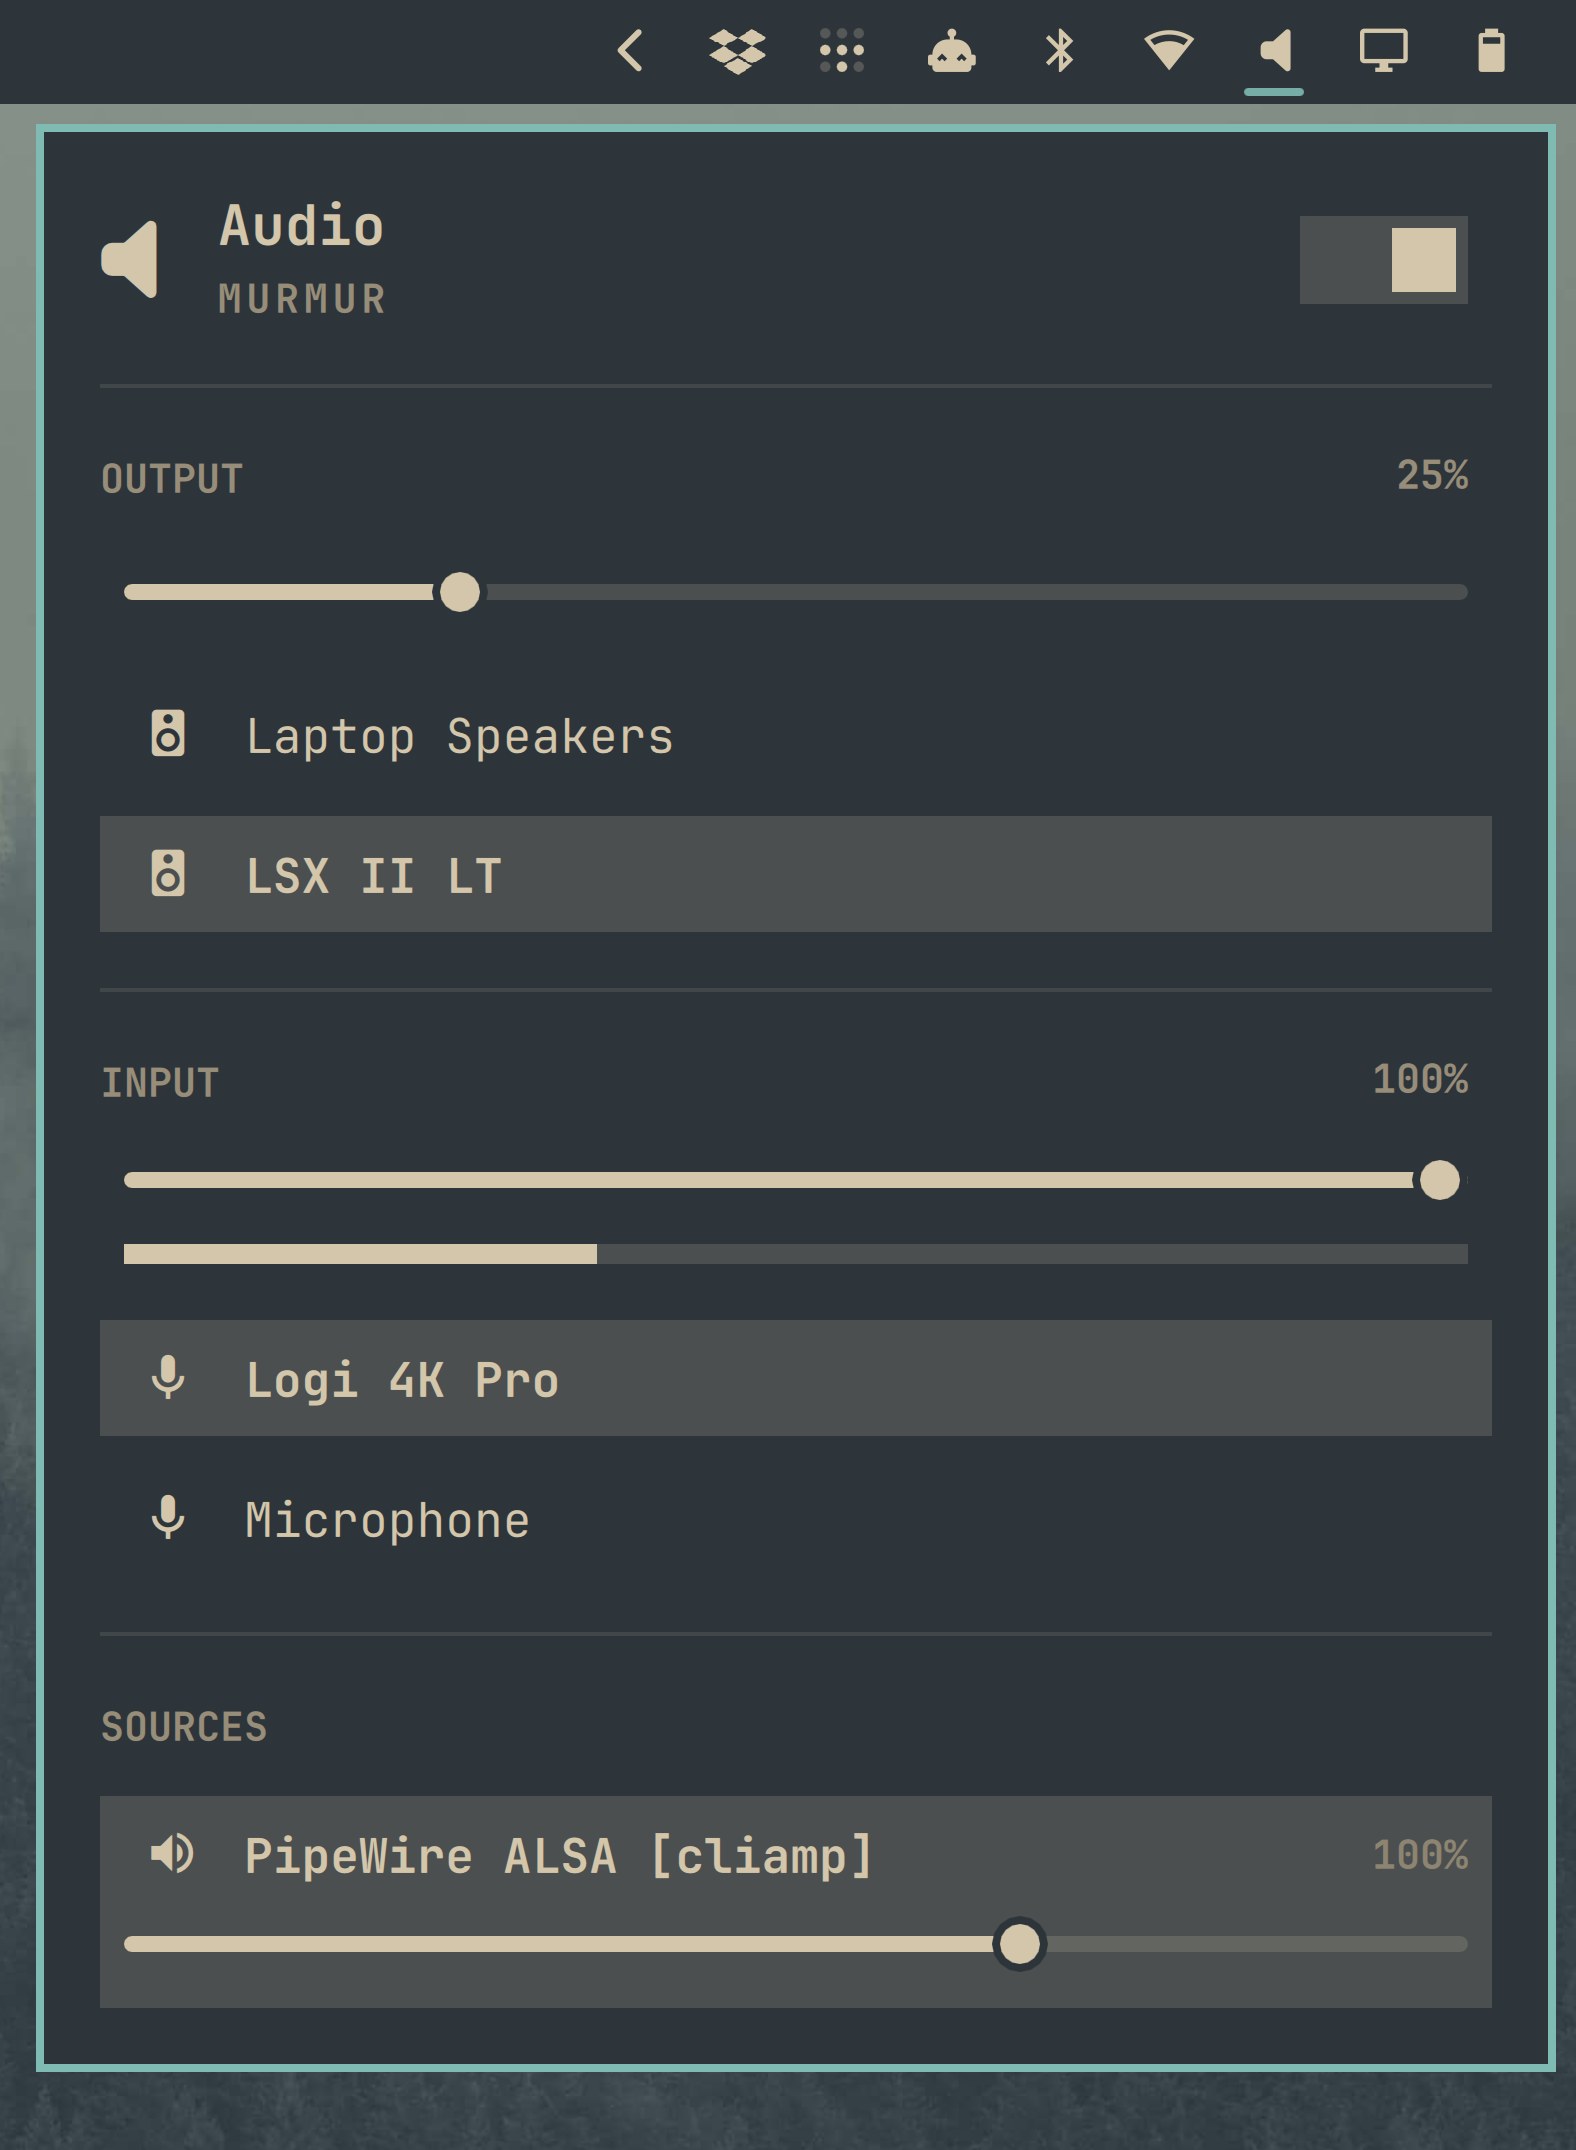
A beautiful desktop is not useful if typing or a work call fails. Inspect first, and leave working settings alone.
Before editing settings: Copy the existing file to a clearly named backup, then change only one setting in the original. Save and close the editor, and check the result. Keep the old value so you can undo the change. Section 7 explains the file locations and backup method in more detail.
❗Warning: Setup > Input and Setup > Monitors can open an editor, not a wizard. Use the copy-first method above before editing; leave settings alone if they already work.
⌨️ Typing: Test harmless text with your usual punctuation, never a real password. For mismatches, Setup > Input opens ~/.config/hypr/input.lua. Caps Lock is a compose key for special characters by default, so unexpected behavior may not indicate broken hardware.
🖥️ Display/readability: Click Display and note current values. Whole-desktop scale changes interface size; text size is separate.
For changes that need a configuration file, Setup > Monitors opens ~/.config/hypr/monitors.lua. Follow the monitor guidance, not somebody else’s scale ratio.
If an app stays oversized after a GTK scaling change, save your work and reopen the affected app. For text-size changes in the Foot terminal, open a new terminal.
🌐 Network: Open Network, then load a known HTTPS page. A connection icon alone does not prove internet access.
🔊 Audio: Check the output and mute controls in Audio. Test the microphone separately in your meeting app; working speakers do not verify microphone input.
📶 Bluetooth: Pair only the devices you need for your work.
🔋 Power: Choose a suitable profile from those your hardware supports. Save before trying suspend/resume.
📹 Meetings, if needed: Test your actual app’s camera, microphone, and screen sharing with harmless material before relying on them for work.
If an unfamiliar editor blocks you, choose an installed alternative through Setup > Defaults > Editor. In an unchanged Neovim file, press Escape, type :q, then Enter to exit.
Stop when typing, readability, connectivity, and required peripherals are usable. Consult troubleshooting for unresolved symptoms.
3. Update through Omarchy and separate recovery from backup
Priority: Essential
Choose a maintenance window away from important meetings. Save work, check internet access and free space, and use AC power on a laptop when practical. First, back up important files separately.
A snapshot is a local undo checkpoint for system files. Restoring it leaves /home, including personal settings in ~/.config, unchanged. Disk failure can destroy both the system and its same-disk snapshot; an independent backup is a separate safe copy.
System recovery: System files (root) → same-disk snapshot → restore system files
Personal recovery: Documents + projects + personal settings → independent backup → personal-file recoveryFirst, back up your personal files:
- Select documents, projects—including uncommitted work—and personal settings.
- Save and close files, then copy, not move, to a new dated folder on a verified separate device or suitable remote/versioned backup destination.
- Reopen a harmless copied file, or restore a sample separately. Repeat regularly. If copies contain private material, restrict access to the backup or encrypt it.
A manual copy captures files at that moment, without automatically keeping older versions. A running database needs its own backup procedure, not just copied files.
Then, update Omarchy: Read release notes and stay on stable, the starting channel for new installations. The updates manual describes stable’s Arch package mirror as one month behind upstream for compatibility checks—not immediate delivery of every upstream fix.
With your backup checked, choose Update > Omarchy. The terminal command below is an alternative, not a second required task.
Warning: The updater can continue without creating a snapshot. Read any snapshot-failure warning before relying on that recovery option.
For the terminal route, run:
omarchy update
This coordinates package updates with migrations—the system and configuration adjustments needed for the release—and attempts a pre-update snapshot. Read prompts and warnings, let the transaction finish, and follow restart guidance. There may be nothing pending.
Direct pacman/yay system upgrades skip that coordination. Use Omarchy’s workflow without substituting those upgrades, performing partial upgrades, or disabling the upgrade guard.
Recovery reference — only if an update goes wrong
Booting an available snapshot lets you try an earlier system state. Restoring it makes your computer use that state on future boots. Follow the version-specific instructions for these separate actions only when recovery is needed.
The documented bootable-snapshot recovery uses the Limine boot menu, not GRUB/systemd-boot. Your current personal settings may need adjusting to work with older applications.
4. Install only what you need and choose familiar defaults
Priority: Recommended; essential if a missing app blocks work
Search installed apps first: your tool may already be there. For a familiar editor, start with Install > Editor. The Terminal and Browser categories offer those alternatives; use Install > Package for other apps. Check the description and source so you know what you are installing and where it comes from. Then review dependencies in the proposed installation. Curated choices can come from different repositories.
Settings files may open in Neovim, the editor; LazyVim supplies its configuration and plugins. Select a familiar alternative through Setup > Defaults > Editor. The Browser and Terminal entries also set defaults separately from installation.
Warning: Community build recipes need review. Popularity or an installation helper does not establish trust. If you cannot evaluate a recipe, stop and seek help or choose an alternative.
The AUR, or Arch User Repository, contains community-maintained build recipes rather than official repository binary packages. Prefer a suitable repository package. Before using Install > AUR, follow the ArchWiki review guidance. Start with PKGBUILD and any install scripts, which can execute code during installation. Review source URLs and accompanying files too, rather than treating the package name as enough information.
Try the real document or task and check that a fresh launch or link uses your selected default. That is enough. If removing an unwanted app through Remove > Package, review the full removal list; avoid aggressive day-one dependency cleanup.
5. Build one simple workspace and clipboard habit
Priority: Recommended
Tiling automatically arranges ordinary windows to share space instead of overlapping. Workspaces are different desks in the same office, not different computers. A simple arrangement is enough:
One shared workstation: [1: Browser/docs] · [2: Editor/terminal] · [3: Administration dashboard]Put browsing on workspace 1 and your editor/terminal on 2. Switch with Super + 1, Super + 2, or Super + 3; change window focus with Super + Arrow. Try Super + Shift + 3 on a disposable window: it moves the window and follows it. Move back with Super + Shift + 2. For an awkward dialog, Super + T toggles between tiling and floating.
For unified copy/paste, use Super + C and Super + V; they work almost everywhere. Super + Ctrl + V opens history. Selecting an older entry puts it on the clipboard, ready to paste with Super + V.
Practice with harmless text between browser and editor. History can retain text and images, so avoid passwords, tokens, and customer data. Never run an unknown pasted command as a clipboard exercise. You have the basic workflow once you can switch spaces, move a window, and retrieve an older item.
6. Keep the security defaults and distinguish SSH client from server
Priority: Essential

For normal ISO installations, the official security documentation describes LUKS disk encryption: protection for encrypted data at rest, such as on a lost, powered-off laptop. It does not prevent a program in your unlocked session from reading accessible files. Custom installations may differ.
Keep the firewall enabled. Documented defaults restrict incoming traffic, with a LocalSend exception on port 53317. This does not prove every application or container safe.
When stepping away, lock with Super + Ctrl + L. Use a trusted password manager for credentials, and keep those secrets out of screenshots and clipboard history.
An SSH client initiates a remote connection; SSHD accepts incoming connections. Leave Setup > Security > SSHD off unless another machine needs to connect into this workstation. Connecting outward to a home server or VPS does not require enabling it.
Sudo authorization prompts give you control over privileged system changes. That control is worth retaining when using scripts or AI agents, rather than enabling passwordless sudo. Enter your password when a trusted action you started asks for it; cancel an unexpected prompt.
Optional fingerprint support depends on hardware and does not replace the boot disk-decryption passphrase. Retain password access as a fallback.
7. Find your personal settings before editing them
Priority: Essential before file edits

Dotfiles are configuration files or directories often hidden by a leading dot; ~ means your home directory. Think of ~/.config as your adjustment sheet over supplier defaults: make personal changes there, rather than in package-owned /usr/share/omarchy. The dotfiles manual identifies these Omarchy 4 paths:
| 📂 Omarchy 4 path | 🎯 Purpose |
|---|---|
| ~/.config/hypr/hyprland.lua | Loads defaults and personal modules; inspect only here |
| ~/.config/hypr/bindings.lua | Personal hotkeys |
| ~/.config/hypr/input.lua | Keyboard, mouse, trackpad |
| ~/.config/hypr/monitors.lua | Display mode, placement, scaling |
| ~/.config/omarchy/shell.json | Bar, widgets, idle/lock settings |
| /usr/share/omarchy | Package defaults; not for personal edits |
Note: Once you customize shell.json, new default widgets may not appear automatically. The shell uses your file instead of combining its contents with the defaults. Before personalization, this file may not exist.
Before editing, copy the existing file in Files. For your user-owned input file, this terminal alternative needs no sudo:
cp -i -- "$HOME/.config/hypr/input.lua" "$HOME/.config/hypr/input.lua.before-first-edit"
Success is normally silent; verify the copy. Decline any prompt to overwrite an older copy and choose a fresh name. If the source is missing, check version-specific guidance before proceeding. This local undo aid is not disk-loss protection.
Open the original through its Setup entry and change one value, preserving syntax. Save and close the editor to trigger required restarts, then check the result. Lua lines beginning with — are comments, not active settings; do not replace a whole file with an excerpt.

Record the file, old value, and known-good copy so you can undo a failed change. Updates can affect behavior; Update > Config or reinstall/reset actions can overwrite personalization.
Include settings in the independent backup from section 3. Before sharing dotfiles publicly, check for credentials, tokens, and private keys and leave those out.
Core setup stopping point: You are ready for useful work when you can check these boxes:
- I can navigate, consult shortcuts, and lock.
- Required typing, display, network, and audio work.
- I know the update route, what system recovery does and does not restore, and my separate backup destination.
- Needed apps and preferred defaults are ready.
- I know where my settings live, keep the firewall and authorization prompts, and leave local SSHD off unless needed.
Now do one real task. The remaining sections are optional: return to section 8 for development, section 9 for server access, or section 10 for personalization.
8. Developers: prepare one project, not every toolchain
Priority: Optional / developer-specific
Skip this section if you are not developing software. Otherwise, read one trusted project’s README and version requirements in your chosen editor. Use those requirements as your installation list, and review scripts and configuration before allowing execution.

With Git available, inspect and copy your existing configuration (~/.gitconfig or ~/.config/git/config). If a global identity is appropriate, replace both quoted labels below, retaining the quotes. Choose an email suitable for visible commits; a work repository may need its own identity:
git config --global user.name "YOUR COMMIT NAME"
git config --global user.email "YOUR COMMIT EMAIL"
These commands normally produce no output; check the resulting identity settings. They set commit authorship, not repository-host login. Authenticate separately through the host’s supported HTTPS or SSH method.
Install > Development offers development environments, mostly managed through mise. A runtime executes your program; version management selects the right tool version for the project. Follow existing version files rather than making “latest” a global policy.
For Python, choosing which Python version runs the project is one task. Giving the project its own packages through venv or its environment manager is another. Use that project environment rather than sudo pip for project dependencies.
Optional local services: Containers provide application environments sharing the host kernel. Docker runs the containers; Compose describes how related services fit together. Lazydocker gives you a terminal interface for managing them. Add these only if your project needs them.
Keep Docker’s installed authorization prompts rather than joining the Docker group to avoid them. These local services become unavailable when the laptop sleeps, but are not necessarily deleted. Production hosting is a separate task.
Project readiness: With your editor and required runtime ready, check that Git uses your intended identity and that repository authentication is established.
9. Server users: connect your workstation to an existing server
Priority: Optional / server-specific
SSH provides encrypted remote access. Your laptop is the control desk; an independent host can keep working when you close it. A home server or an AlexHost Linux VPS can fill that role. The remote OS might be a supported Debian or Ubuntu server release; Omarchy stays local.
Administration, not deployment: Omarchy workstation → verified encrypted SSH connection → existing home server / Linux VPSBefore connecting, you need an accessible server and its login, address, and SSH port. Authentication must already be set up. Without those access details, stay with the overview.
You also need an independently trusted host-key fingerprint—a short identifier for the server’s key. The server’s host key identifies it; your key pair authenticates you. Only your public key is authorized remotely during separate setup. Do not send your private key to the server or publish it.
Warning: Compare the SSH prompt’s fingerprint and key-type label with a trusted operator or provider-console record. If either differs or the record is missing, cancel rather than bypassing the check.
Replace the uppercase placeholders with the server’s SSH port, login name, and hostname or IP address; use 22 only if supplied. Connect from your local terminal:
ssh -p SERVER_SSH_PORT SERVER_LOGIN@SERVER_HOSTNAME_OR_IP
Follow OpenSSH host-key verification before authenticating. Prompts vary; verified first acceptance normally records identity in ~/.ssh/known_hosts.
Successful authentication opens a remote shell through the client described in section 6; leave local SSHD off. Later, named hosts in ~/.ssh/config can simplify connections.
Omarchy’s retry helper reconnects; it does not preserve remote processes. A terminal-session manager such as tmux can preserve work across disconnects when that work runs inside tmux on the server. Local tmux alone cannot.
Always-on applications still need production service management; tmux does not survive a server reboot.
10. Personalize lightly and try two everyday utilities
Priority: Optional
Comfort is a useful finishing touch. Choose a theme through Style > Theme; it affects supported components, not every app. For readable text, use Style > Font. You can change the wallpaper separately with Super + Ctrl + Space. Night light is another preference for evening use, while the Power panel lets you revisit battery priorities.
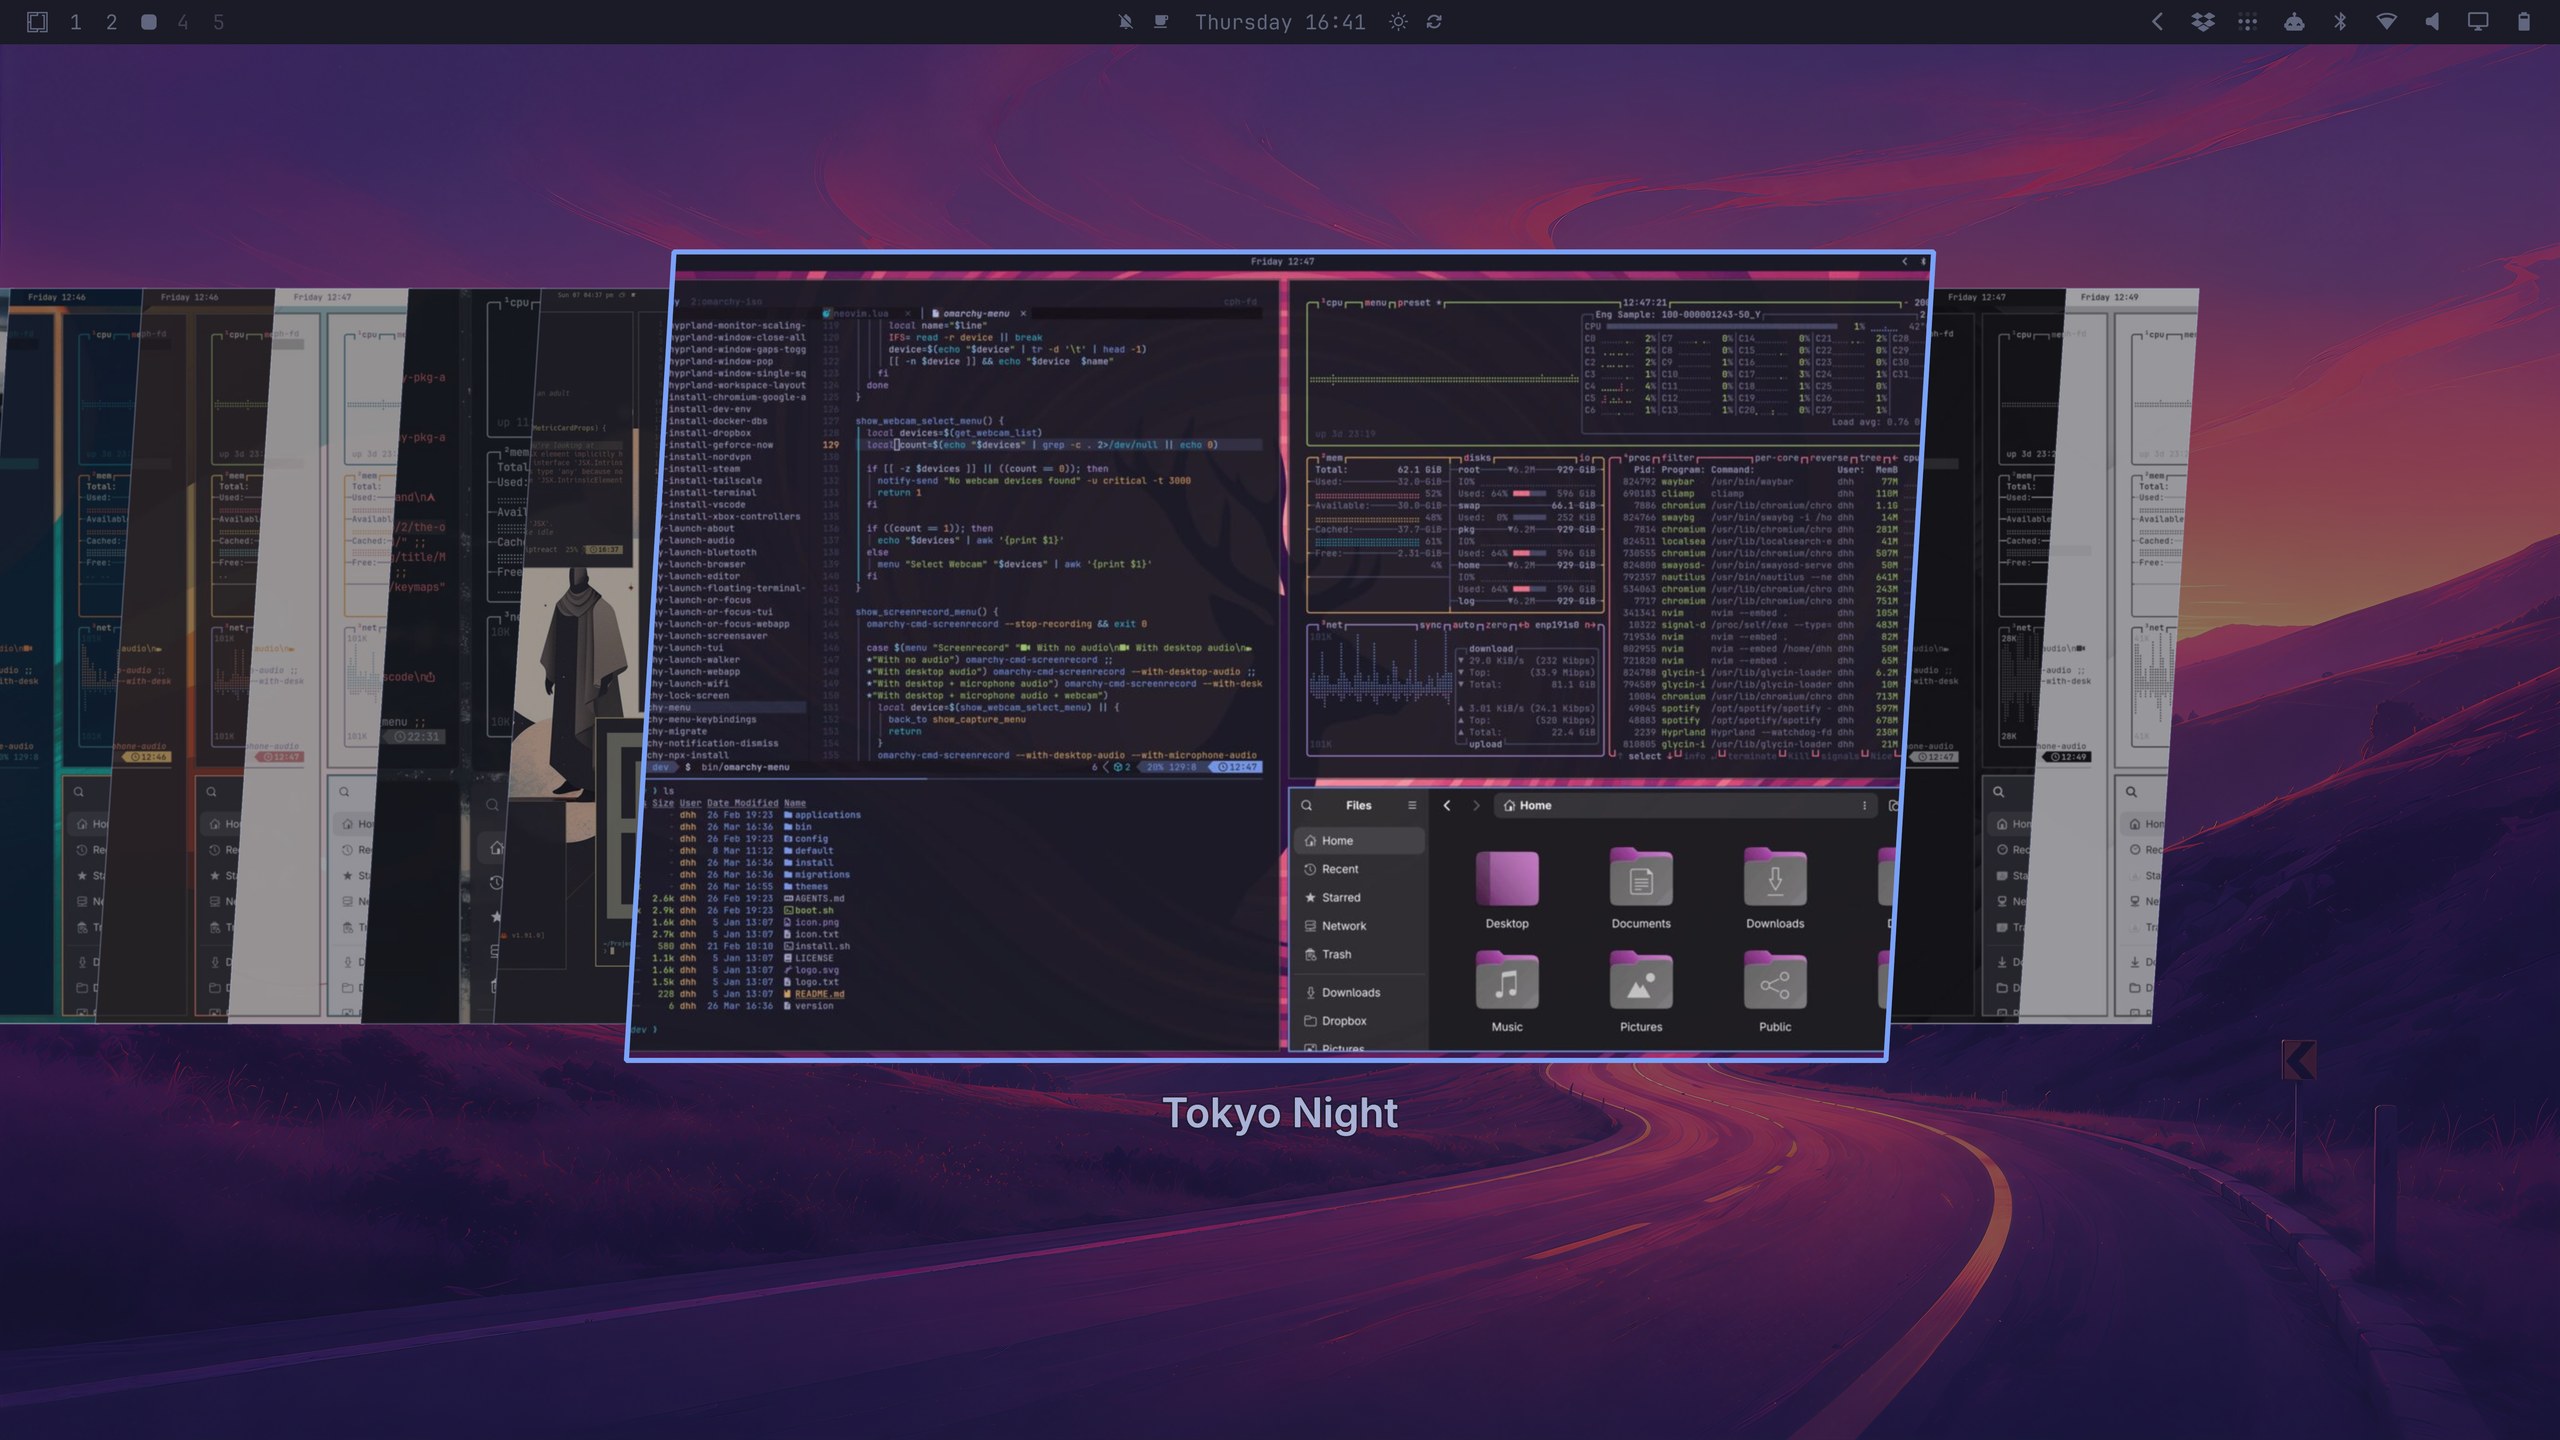
For a support screenshot, hide secrets first, then use Trigger > Capture > Screenshot or Super + Ctrl + C. Capture the relevant region and inspect the exported image before sharing. Documented defaults save captures and copy them to the clipboard; later redaction does not remove earlier copies.
To send that screenshot, open LocalSend on the other device and use a permitted local network. Select the file through Trigger > Share > File and confirm the recipient. Approve the transfer on the receiving device, then check that the test file opens. If discovery fails, guest isolation may be blocking it. VPNs or network policy can also interfere; do not disable the firewall to fix it.
Note: Dictation, AI, and plugins can wait. Unattended agents may act without approval prompts; unsandboxed plugins run code with your access. Both require deliberate trust decisions, not first-day activation.
If something feels broken, use the smallest appropriate fix

Start with the symptom, not a reset. These are first actions, not diagnoses. Update > Hardware restarts can interrupt calls or transfers; they are not guaranteed driver repairs and differ from Update > Firmware.
| Symptom | Smallest first action |
|---|---|
| ⌨️ Unfamiliar shortcut | Open Super + K |
| 🔍 Oversized app | Check Display controls; save/reopen affected app |
| 🔇 Silent speakers | Check Audio output and mute |
| 🛠️ Wi-Fi/Bluetooth/audio/trackpad stopped | Save work; Update > Hardware > relevant component |
Match the fix to the last change. After a personal edit, use your known-good copy from section 7. After an update, inspect warnings and release notes and follow matching official troubleshooting or recovery guidance. Back up customizations before any reset or config replacement.
If a narrow fix fails, seek version-specific help and describe the recent change. Include your Omarchy version; share relevant logs only after reviewing and redacting them.
Your first-day stopping point
Whether you stopped at the core checklist or explored an optional section, the next step is useful work: write a document, work on a project, or manage an existing service. Learn shortcuts gradually. Use the links above to explore configuration, development environments, or SSH/server workflows as needed—not as unfinished first-day homework.