Open Ticket
  +373 79 600002
  Telegram Live Chat
  F.A.Q
F.A.Q  English
 Русский
  Română
  Deutsch
  Français
  Türkçe
  Español
  Português
  Українська
  български
  Polski
  Indonesia
  中文 (中国)
























































































































 on All Hosting Services






25.05.2026 Updated: 02.09.2026
Administration Dedicated Servers
Custom ISO Installation via IPKVM: Dell Servers (2x Intel(R) Xeon(R) Gold 6138)
Dell Servers (2x Intel(R) Xeon(R) Gold 6138)
Applies to:
- 2x Intel(R) Xeon(R) Gold 6138
This platform uses the Dell EMC remote console layout, but the installation flow is still the standard Dell iDRAC method: launch the console, map the ISO through Virtual Media, reboot, open the one-time boot menu, and boot from the virtual optical drive.
Before You Start
- Make sure you have IPKVM/iDRAC access credentials.
- Keep the ISO file ready on your local computer.
- Schedule downtime. Booting from a custom ISO can interrupt services, and a reinstall can erase existing data.
Step-by-Step
- Log in to the server’s Dell iDRAC or IPKVM panel.
- Open the remote console and click Launch.
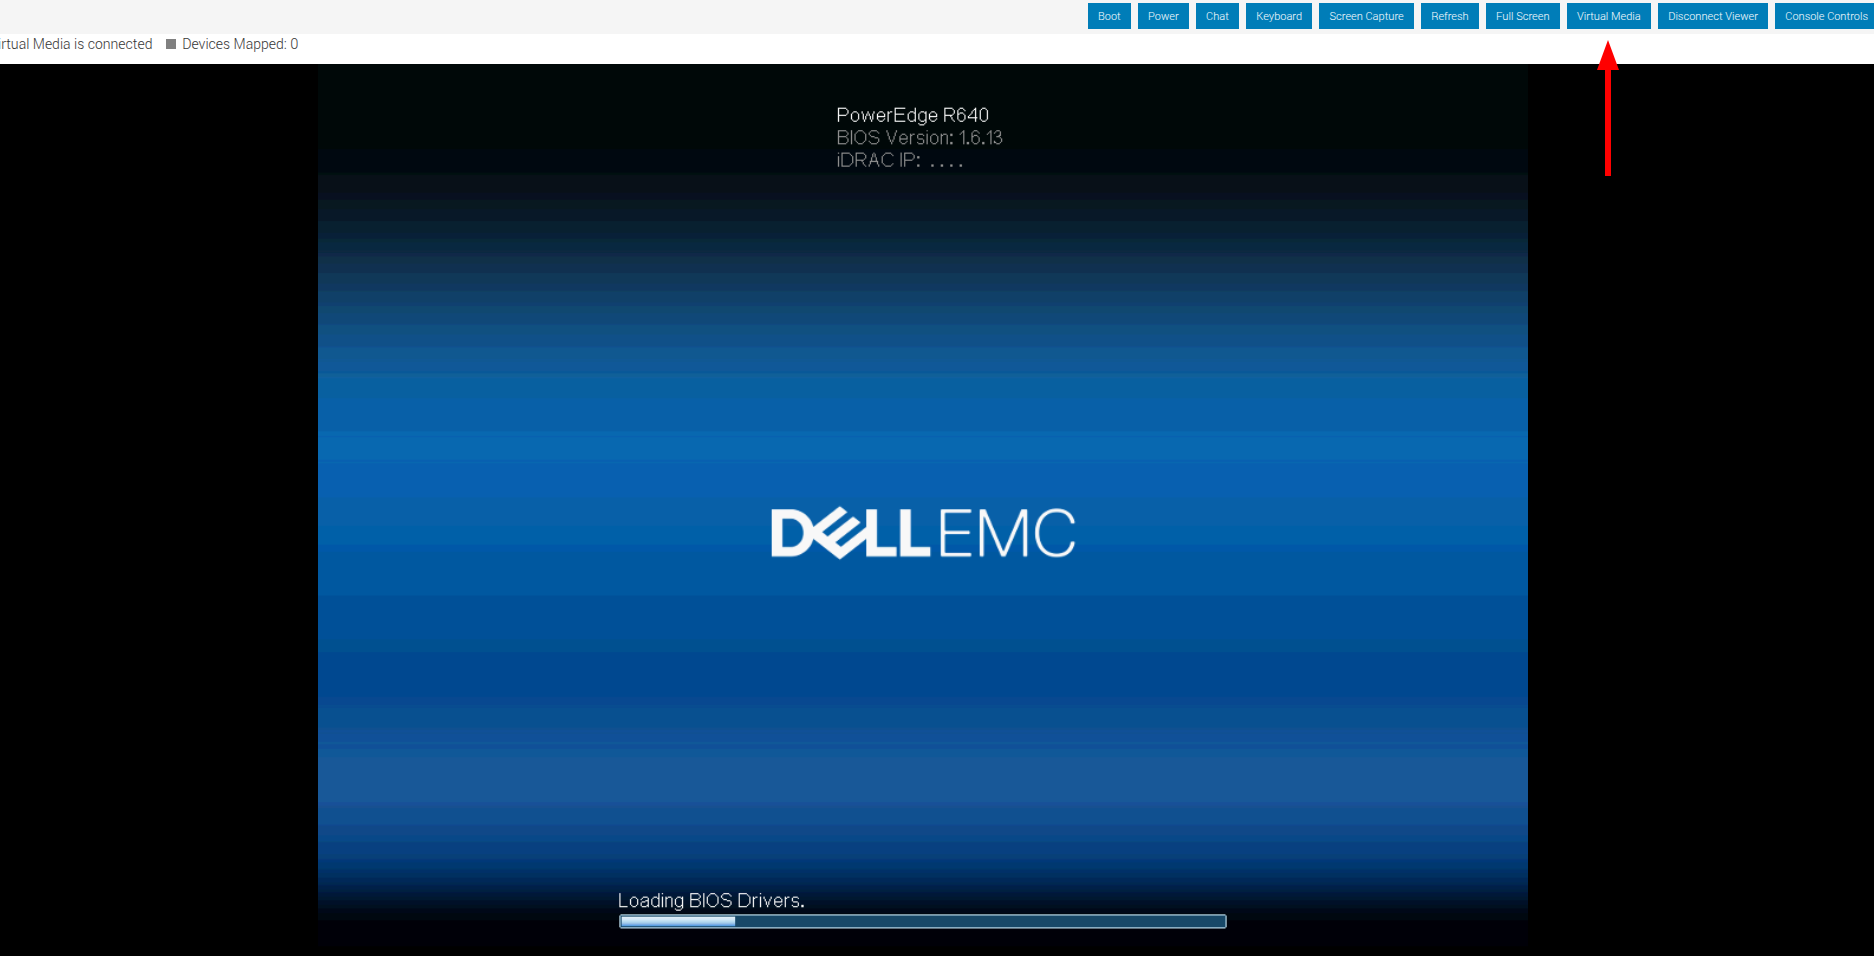
- In the console toolbar, click Virtual Media.
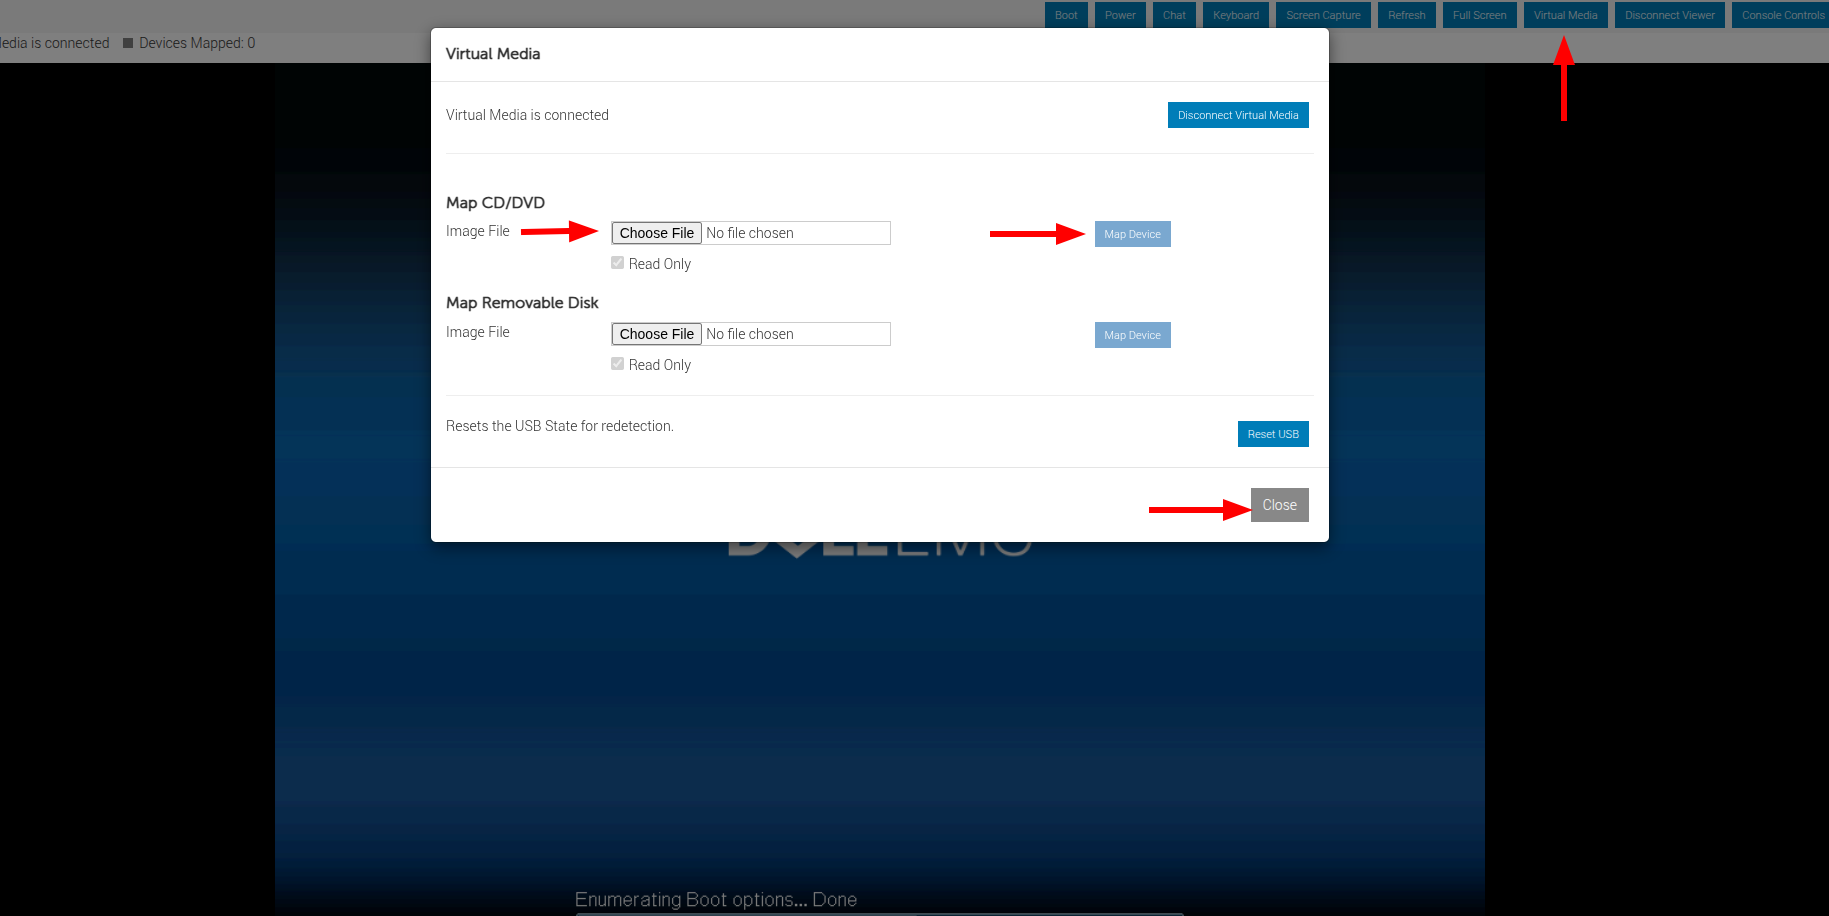
- Under Map CD/DVD, click Choose File and select your ISO.
- Click Map Device to attach the ISO as a virtual optical drive.
- Close the Virtual Media window.
- Reboot the server.
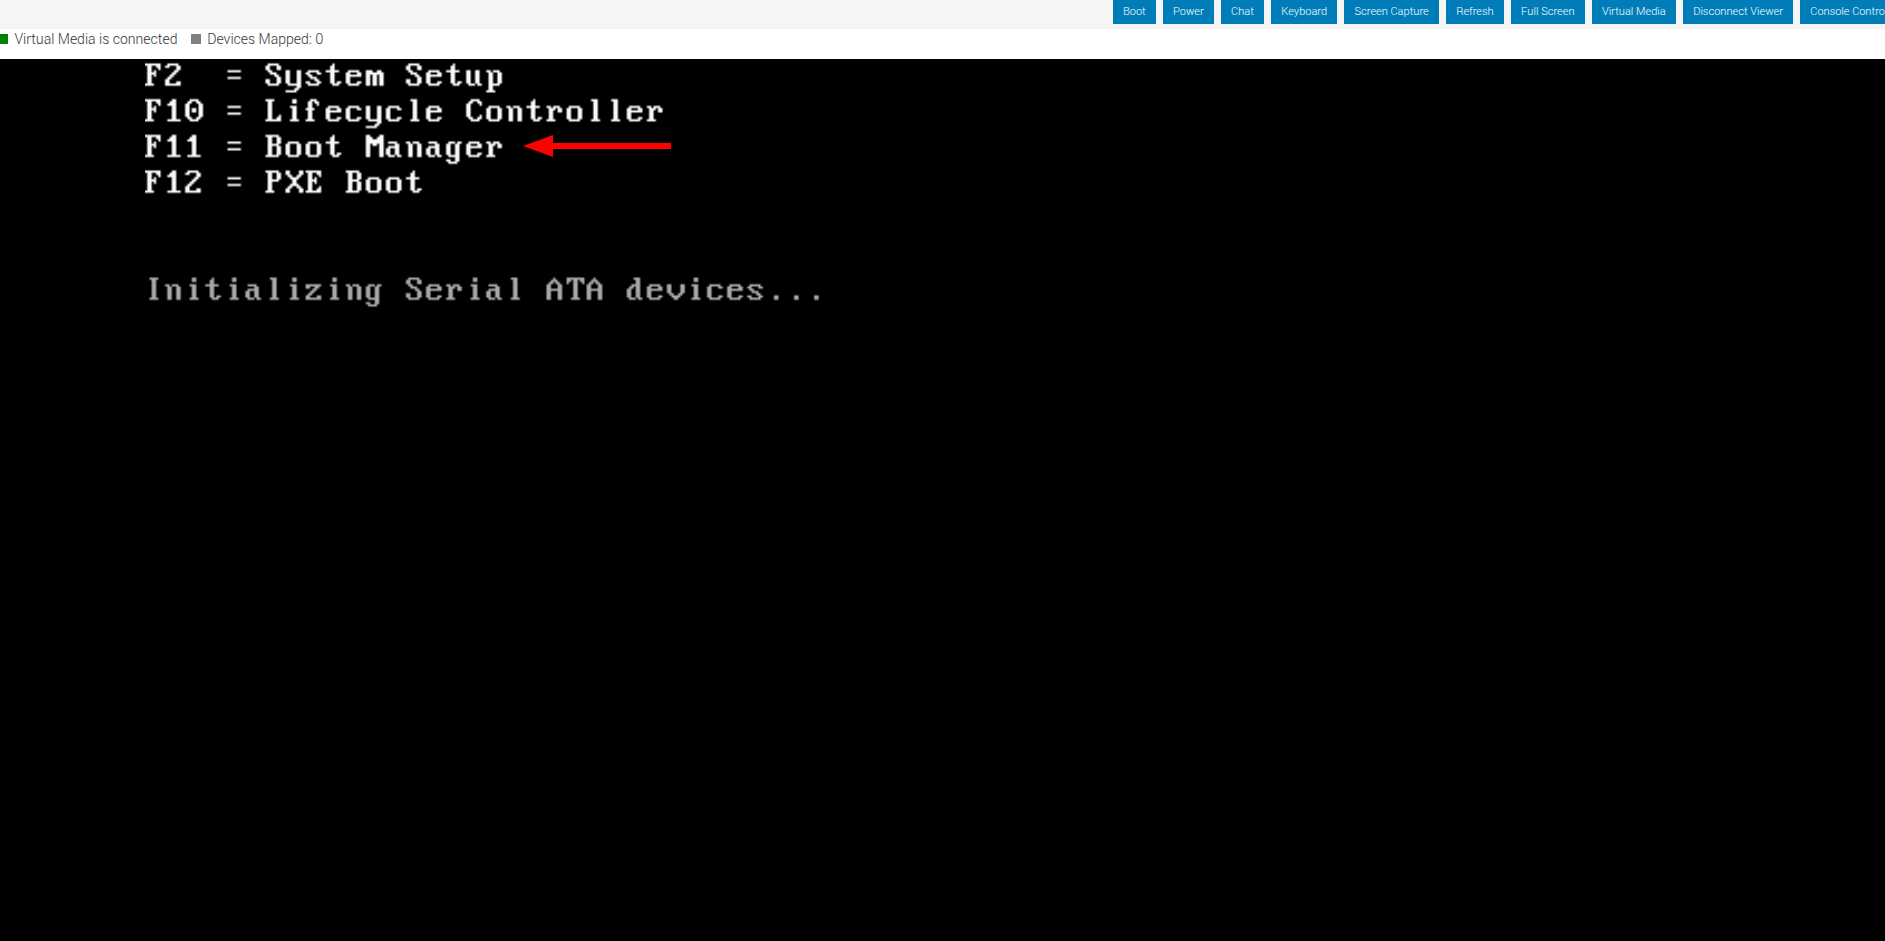
- During startup, press F11 to open Boot Manager.
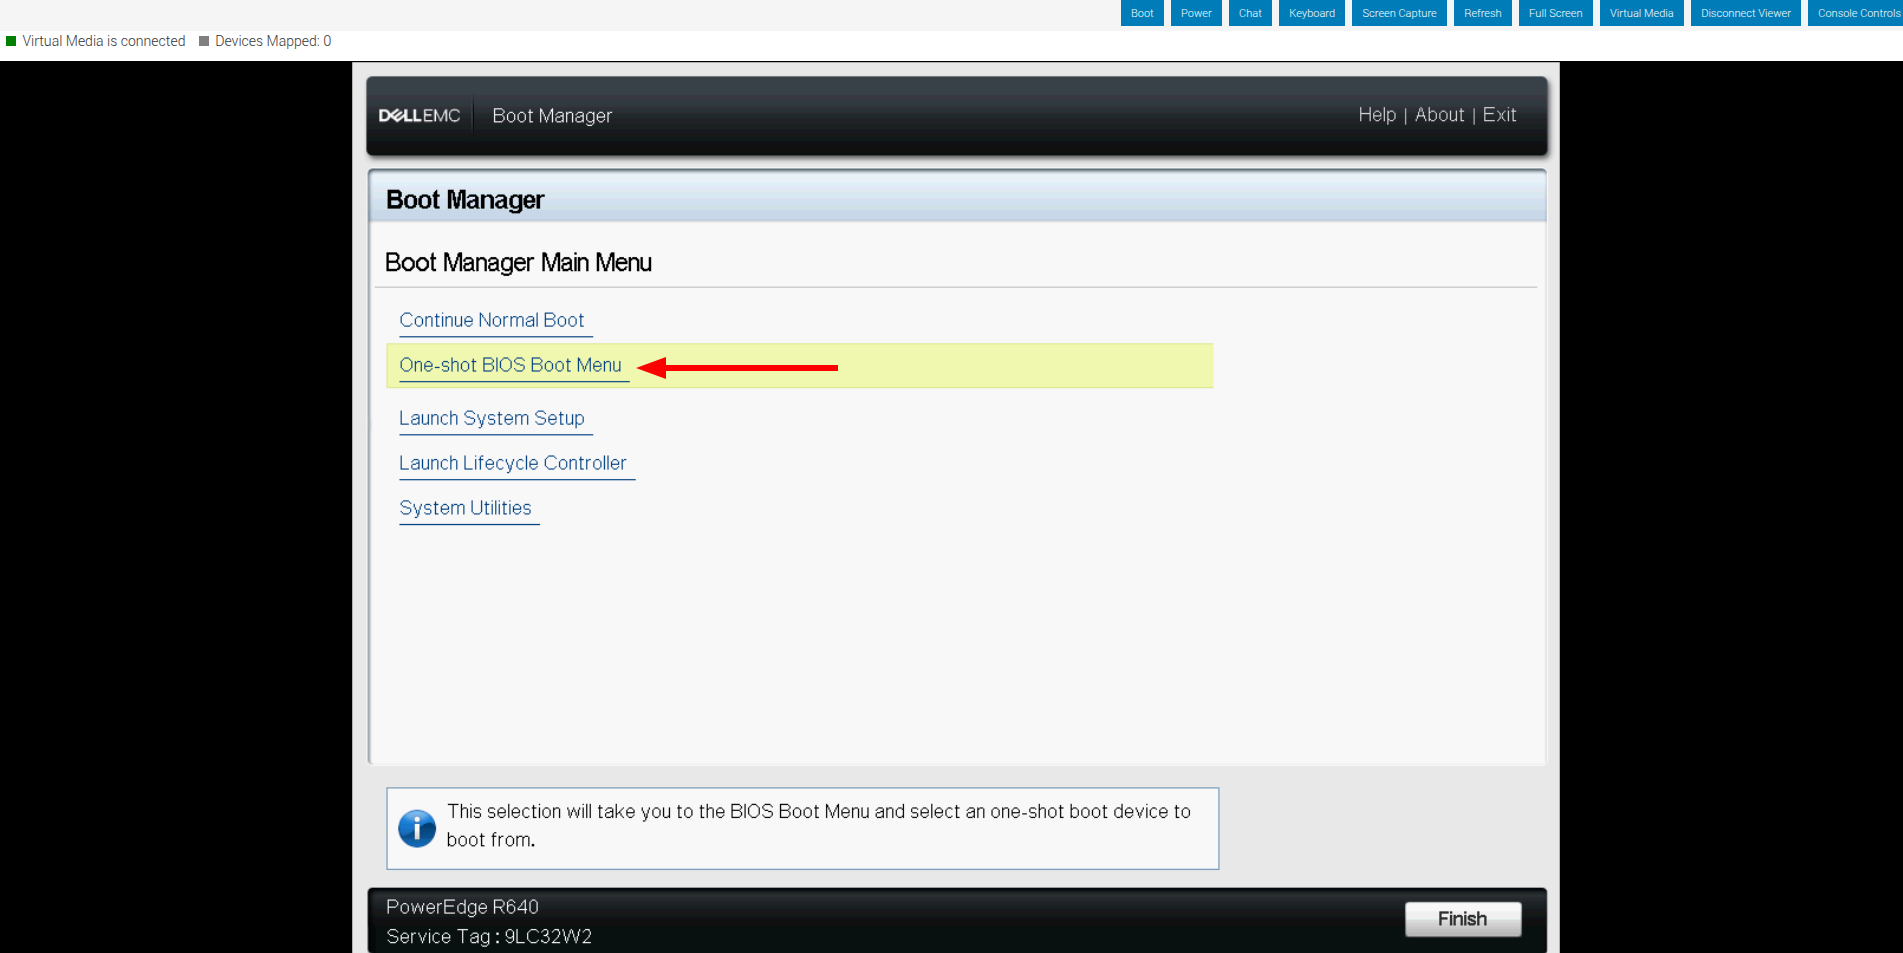
- Select One-shot BIOS Boot Menu.
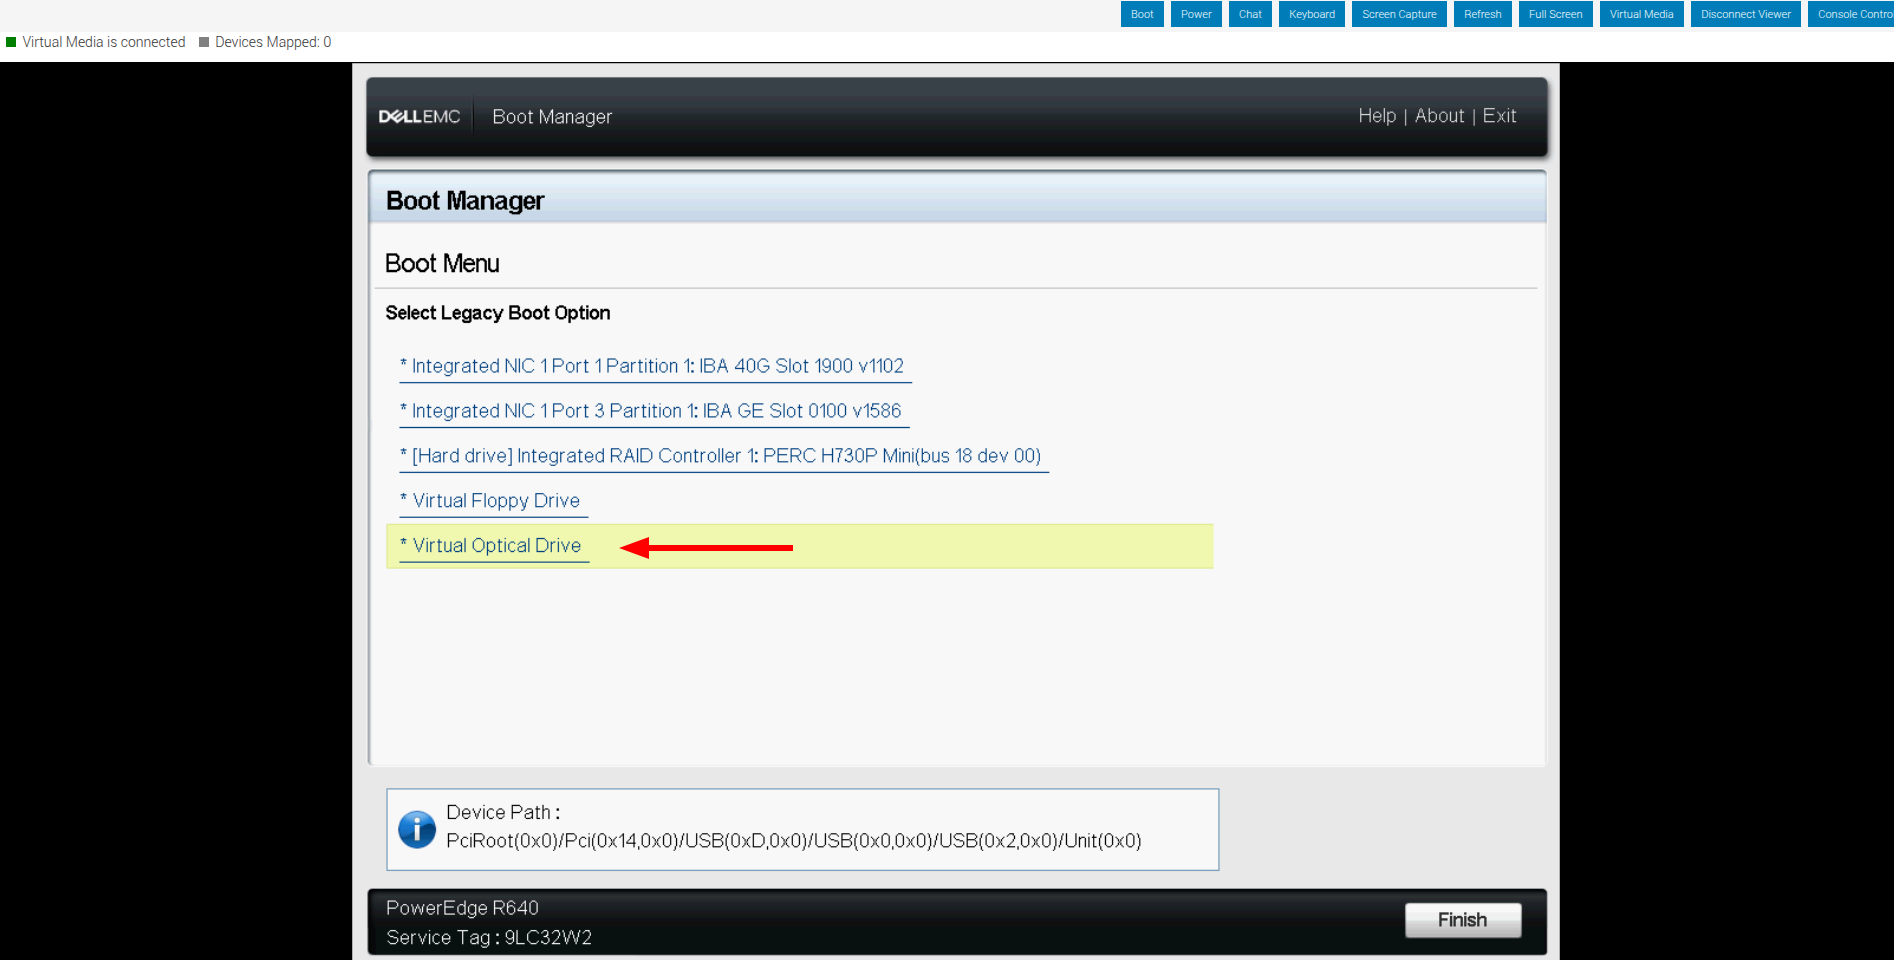
- Choose Virtual Optical Drive from the boot device list.
- The server will boot from the mounted ISO. Complete the operating system installation as usual.
- After the installation finishes, disconnect the virtual media and reboot so the server starts from the installed disk.
Screenshot Reference
After launching the remote console, click Virtual Media in the top toolbar.
Under Map CD/DVD, choose the ISO, click Map Device, close the window, and reboot the server.
Press F11 to open Boot Manager.
Select One-shot BIOS Boot Menu.
Select Virtual Optical Drive.
Useful Notes
- This Dell EMC layout looks different from older iDRAC screens, but the ISO boot process is the same.
- If Virtual Optical Drive does not appear, confirm the ISO is still mapped and reboot once more.
- If the server returns to the installer after setup, disconnect the ISO from Virtual Media and restart the server.