English
 Русский
  Română
  Deutsch
  Français
  Türkçe
  Español
  Português
  Українська
  български
  Polski
  Indonesia
  中文 (中国)


 on All Hosting Services
Hermes Agent Quickstart: From Installation to First Steps
Why Hermes is worth paying attention to

If you have ever installed a new AI tool, watched the binary land in your PATH, and still ended up with something that was technically present but practically useless, you already understand the problem this Hermes Agent quickstart is solving. A finished install only proves files were copied. It does not prove the agent can inspect a repo, talk to a real model, use tools safely, or reopen the work later.
That is why Hermes is worth paying attention to. When it is working properly, it stops feeling like “ChatGPT in a terminal” and starts behaving like an operational agent. It can inspect files, use terminal tools, stay inside a workspace, and carry the session forward instead of acting like every prompt starts from zero again.
That makes it a good fit for developers, self-hosters, and terminal-first users who want help with real tasks: summarizing a codebase, checking a repo on a personal machine, or running on a small VPS from AlexHost, or any other provider without jumping straight into a bigger automation stack. By the end of this guide, you will have Hermes installed, configured, tested on a safe first task, and successfully resumed.
What Hermes is — and what this guide will actually help you do
![]()
Before you run any commands, keep three terms separate. Most first-run confusion comes from collapsing them into one vague idea of “the AI.”
The following table gives you the working mental model for this tutorial:
| Term | Plain meaning | What it does here |
|---|---|---|
| Agent | Hermes itself | The CLI tool that manages sessions, tools, prompts, and approvals |
| Provider | The service or account backing the model | Supplies access to the LLM Hermes will call |
| Model | The actual LLM you choose | Generates the responses and supports tool-using workflows |
This article is aiming at one success state only: a single safe, working Hermes session that you can start, test, and resume. It is not a production deployment guide. It is not a full feature tour. It is the shortest reliable path to “Hermes works on my machine, and I can prove it.”
📝 Note: Installing Hermes is not the same thing as configuring Hermes. The binary can be present and still be unusable until you run hermes model and connect it to a provider and model.
You may notice the official docs also offer hermes setup. That is valid, but this guide intentionally separates installation from hermes model so you can see exactly where most first-run success or failure happens. We also stay classic-CLI-first for reproducibility, although hermes –tui exists and uses the same underlying sessions. Out of scope for this quickstart: gateway setup, cron, MCP, local-model networking, multi-provider routing, and production hardening.
Safety rules before you give Hermes shell access

Before you test any agent with terminal access, decide where it is allowed to be wrong. For this article, that means a non-production machine, a VM, a disposable repo, or at minimum a low-risk workspace where an accidental command would not ruin your day.
⚠️ Warning: Keep approvals in the default safe mode for this entire quickstart, and do not use –yolo. Hermes asks before risky commands; that is a safety feature, not pointless friction.
Use this quick checklist before you continue:
- Start on a low-risk machine or workspace.
- Keep approval prompts enabled.
- Avoid personal production repos for the first test.
- Expect the proof task to stay read-only.
- Treat Docker and SSH terminal backends as later hardening steps, not day-one requirements.
The first real proof task in this guide stays inside ~/.hermes/hermes-agent, which keeps the demo relevant to Hermes while avoiding sensitive projects. Once the base CLI flow is stable, you can move toward stronger isolation with Docker or remote backends. For the first hour, safe and checkable is better than ambitious.
Before you install: prerequisites, supported paths, and one WSL2 gotcha
For mainstream users, the supported story is simple: Linux, macOS, and WSL2 are the paths to care about first. Native Windows exists, but it is still early beta, so if you are on Windows, the practical recommendation is still WSL2.
On Ubuntu 24.04 or WSL2, start by making sure git and curl are available:
sudo apt update && sudo apt install -y git curl
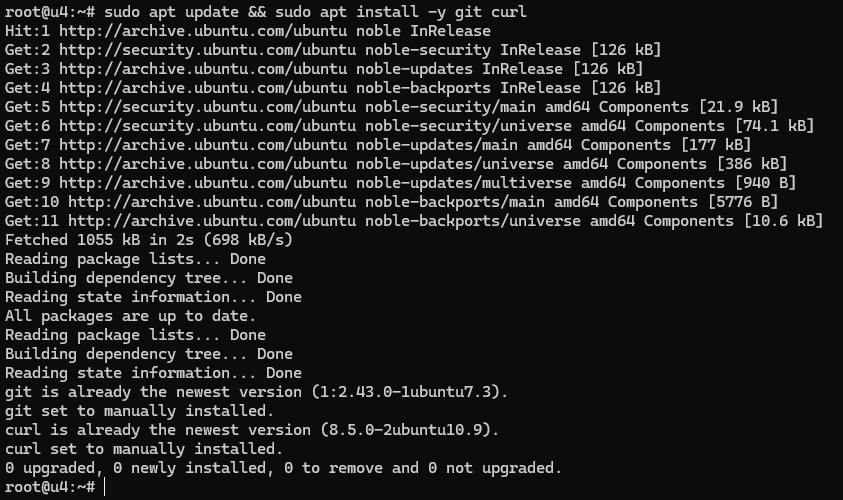
lsb_release -ds && git --version && curl --version

If the second line returns your distro string plus working version output for both tools, your base prerequisites are in place. On macOS, the equivalent check is usually just confirming git –version and curl –version before using the same Hermes installer.
📝 Note: Native Windows is still an early-beta path, so prefer WSL2 if you are on Windows.
💡 Tip: In WSL2, keep Hermes and your working repos under ~ instead of /mnt/c to avoid slower Git operations and odd file-permission behavior.
The good news is that Hermes does not require you to manually assemble a giant dependency stack first. The official git installer handles uv, Python 3.11, Node.js 22, ripgrep, and ffmpeg for you. What you should have ready before the setup wizard starts is a provider account, or at least a tested plan for a custom endpoint. Also, choose a model with at least 64K context: smaller context windows tend to fall apart once the agent starts carrying file context, tool output, and multi-step instructions together.
Install Hermes Agent with the official one-line path

With prerequisites out of the way, run the official installer exactly as documented:
curl -fsSL https://raw.githubusercontent.com/NousResearch/hermes-agent/main/scripts/install.sh | bash
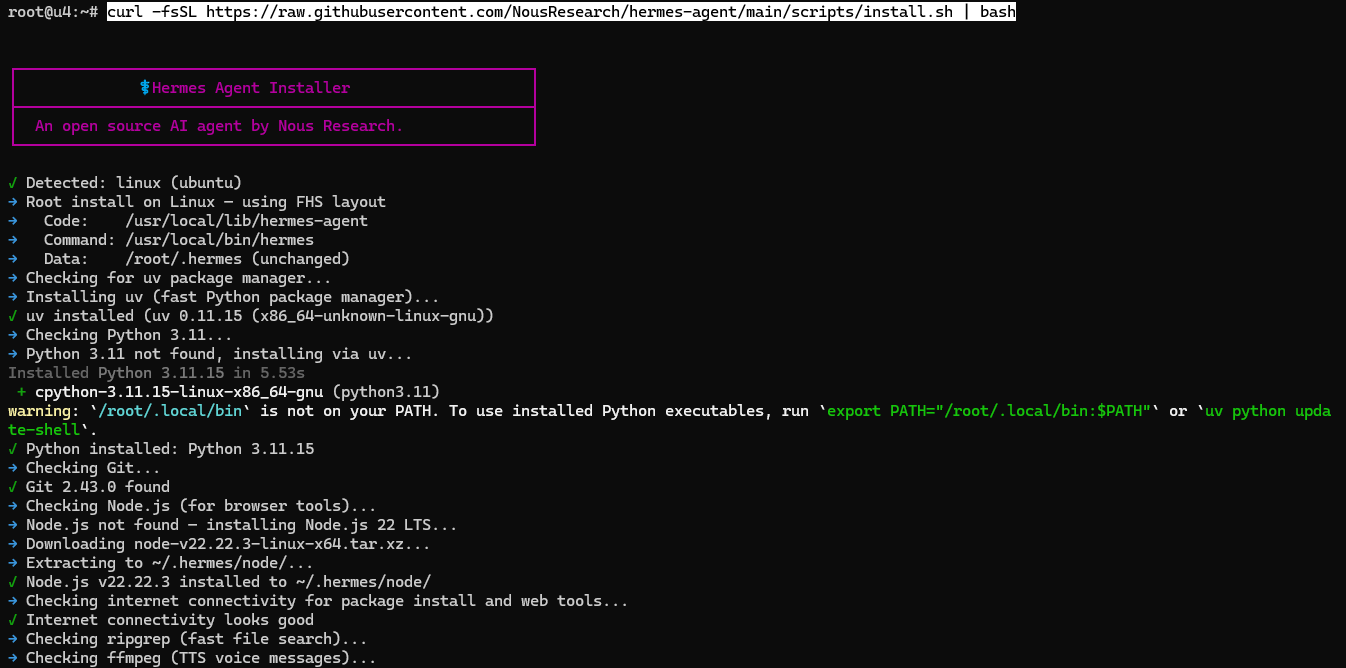
This is now more than a bare install step. Hermes detects the platform, prepares the dependencies it needs, and then immediately continues into the first-run setup flow. In the example above, the installer detects Linux, checks for uv, installs Python 3.11 where needed, prepares Node.js 22 for browser tools, and builds the Hermes command environment.
If your install is performed as root, you may see paths such as /usr/local/bin/hermes, /usr/local/lib/hermes-agent, and /root/.hermes/. On a regular user install, expect the same structure under your own home directory.
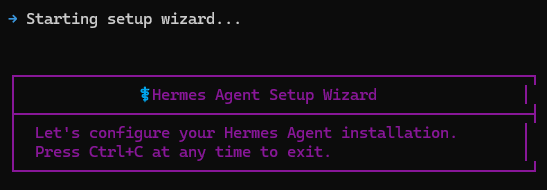
The important detail is that the one-line installer now rolls straight into the setup wizard. In other words, install and first-run configuration are one continuous flow. Do not treat the end of the package install as the finish line, because Hermes is not actually useful until this setup wizard is completed.
The first decision is the inference provider. In this run, OpenRouter is selected, which is a practical first choice because it gives access to a broad model catalog through one provider account. If you already use a different supported provider, choose that instead.
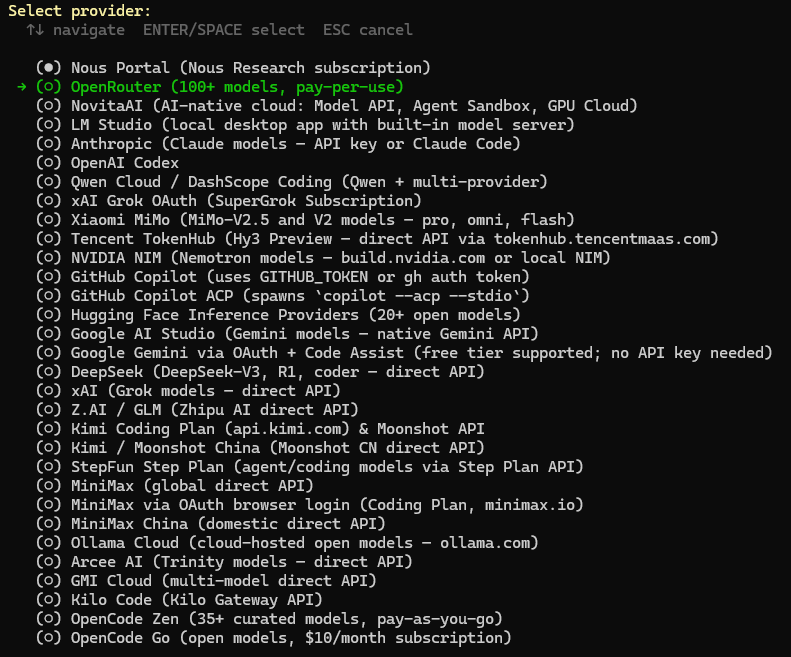
Once the provider is chosen, Hermes asks for the matching API key. In this example, that means OPENROUTER_API_KEY. Paste the key, press Enter, and Hermes stores it for future use.

If you skip this step, Hermes can finish installing, but it will not be ready for a real agent session yet. You would need to come back and configure the provider later.
After the key is saved, the wizard moves to model selection. In this run, the selected model is deepseek/deepseek-v4-pro. That is a valid concrete example, but it is not your only path: the wizard also lets you enter a custom model name or skip and keep the current model if you are re-running setup on an existing install.
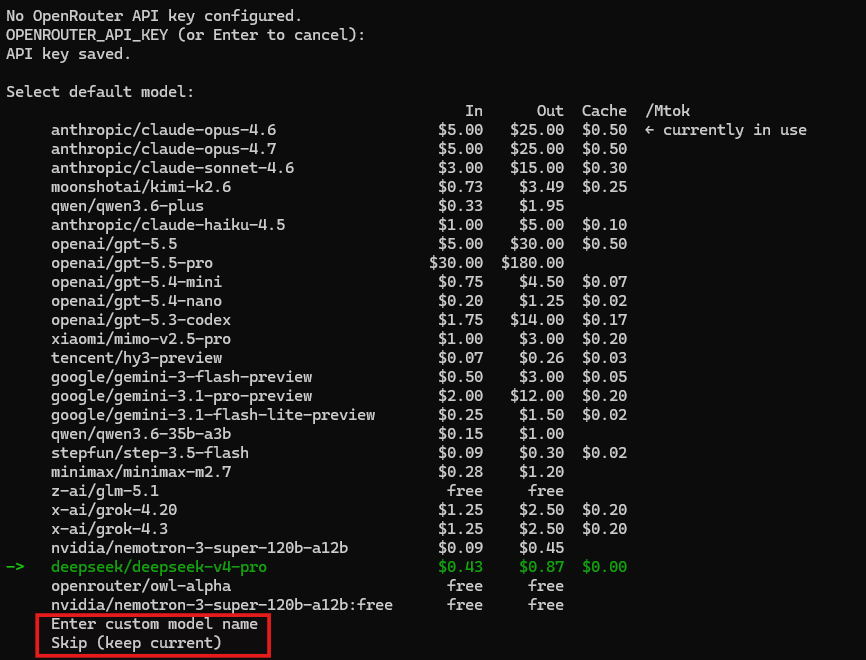
For a first run, the practical rule is simple: pick one model you already know you can access, and make sure it has enough context for real agent work. Hermes is far more reliable with models that offer at least a 64K context window. Smaller context windows may look fine in a tiny test, then break down once tool output, file context, and multi-step instructions start piling up.
If you ever want to change this choice later, hermes model is still the fastest way to re-run provider and model selection without reinstalling anything.
Next, Hermes asks how much of the broader setup you want to do right now. For this quickstart, the recommended option is the correct one: quick setup.

That keeps the article focused on the load-bearing path: provider, model, and the minimum surrounding choices needed to make Hermes usable.
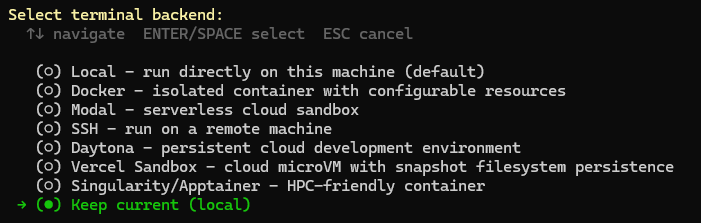
The next screen asks about the terminal backend. For a first run, keep the current local backend so Hermes runs directly on this machine. Docker, SSH, Modal, and other backends are useful later, but they add complexity before you have even confirmed the base CLI workflow works.
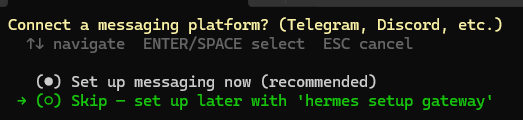
Hermes then offers messaging-platform setup. For this quickstart, skip it. That keeps the guide centered on the core CLI agent flow, and you can add Telegram, Discord, or another messaging path later with hermes setup gateway.
Once the wizard finishes, Hermes shows where it stored the important files.
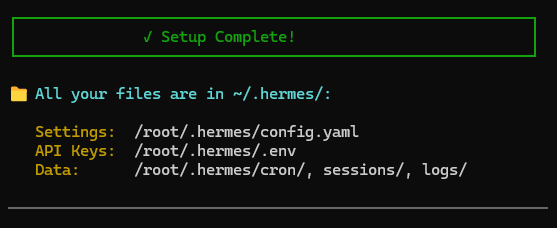
The main split to remember is simple: config.yaml holds non-secret settings, .env holds API keys and other secrets, and the data directories hold sessions, logs, and related runtime state. In this screenshot the paths are under /root/.hermes/ because the install was done as root. On a normal user install, read those paths as ~/.hermes/.
Hermes then prints the short ready-to-go summary, including the commands you are most likely to use first.
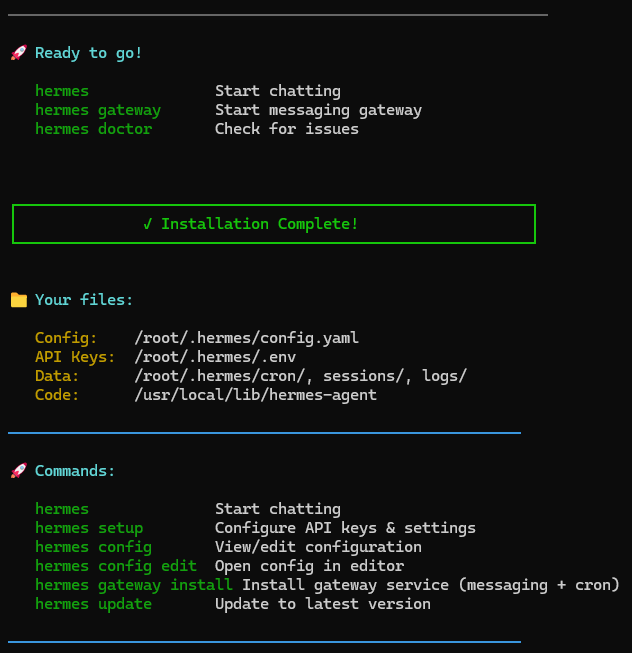
At this point, Hermes is both installed and configured. The next thing to do is verify that the environment is healthy before moving on to the first real task:
hermes doctor
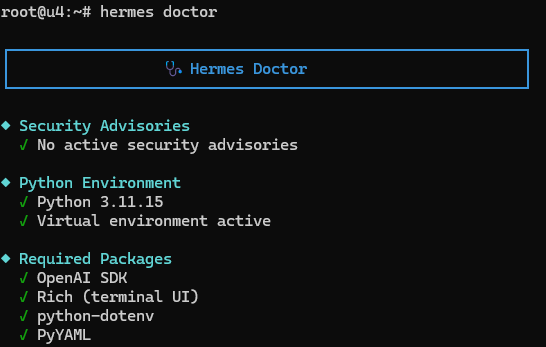
hermes doctor should confirm the basics: no active security advisories, a working Python environment, and the required packages present. That is the clean success signal you want before continuing.
If hermes is not visible in a fresh shell yet, reload your shell and verify the command path before moving on. On Bash that usually means source ~/.bashrc; on Zsh, source ~/.zshrc. If needed, confirm the launcher with command -v hermes.
With Doctor passing, the install is not just finished — Hermes is now actually ready to use.
Run your first safe agent task
With Hermes now installed, configured, and checked by hermes doctor, you are ready for the first real demonstration. The safest high-signal first workspace is your Hermes home directory itself. In this run, the install was done as root, so that directory is /root/.hermes. On a normal user install, the same place would be ~/.hermes.
Move into that directory, confirm where you are, and then launch Hermes:
cd ~/.hermes
pwd
ls
hermes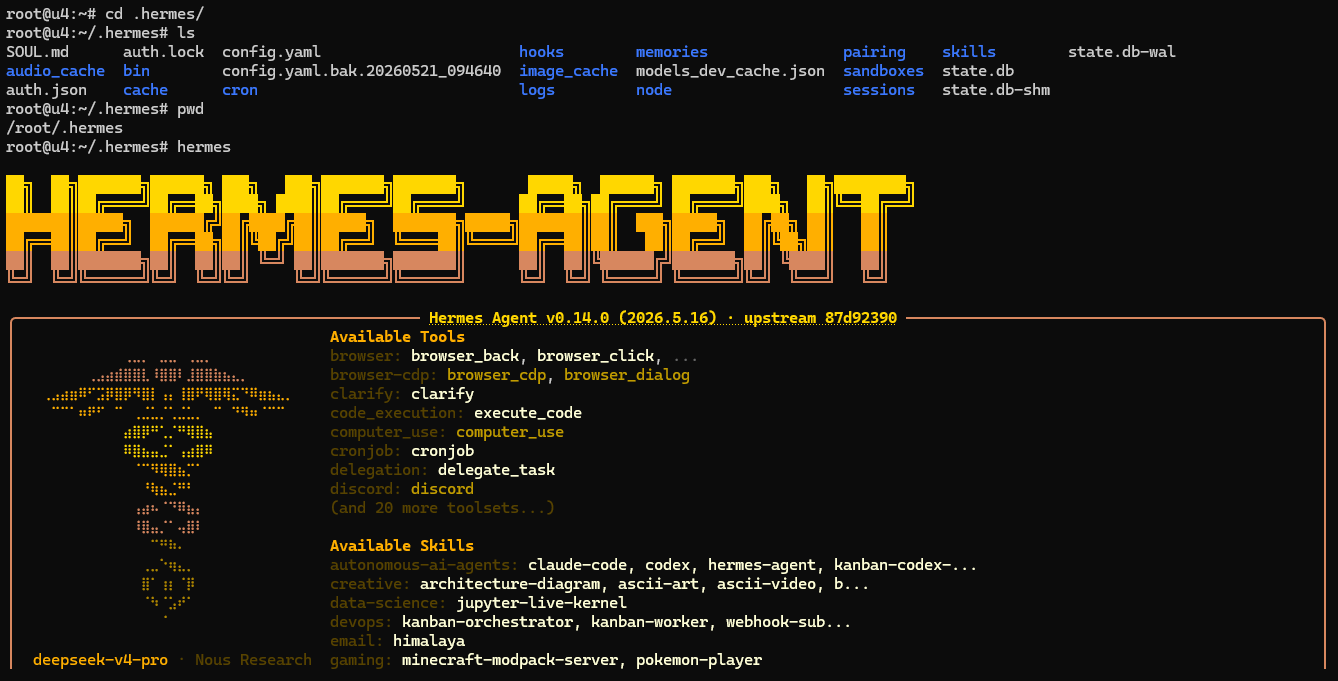
This is a good first workspace because it is already present, directly related to the tool you just installed, and low risk compared with dropping an agent into a personal or production repo. The startup screen is also a useful sanity check by itself: it shows Hermes launching correctly, the active model in the footer, and the fact that the agent can already see its available tools and bundled skills.
If you prefer the newer interface, hermes –tui is still available, but this guide stays classic-CLI-first because it is easier to reproduce step by step and both interfaces share the same sessions.
When Hermes opens, give it a simple, read-only prompt that asks it to inspect the current workspace and identify the entrypoint. In this example, the prompt explicitly targets /root/.hermes because the install was performed as root. On a normal user install, point it at your own ~/.hermes directory instead.
Use the following prompt:
Summarize this repo in 5 bullets and tell me what the main entrypoint is: ~/.hermes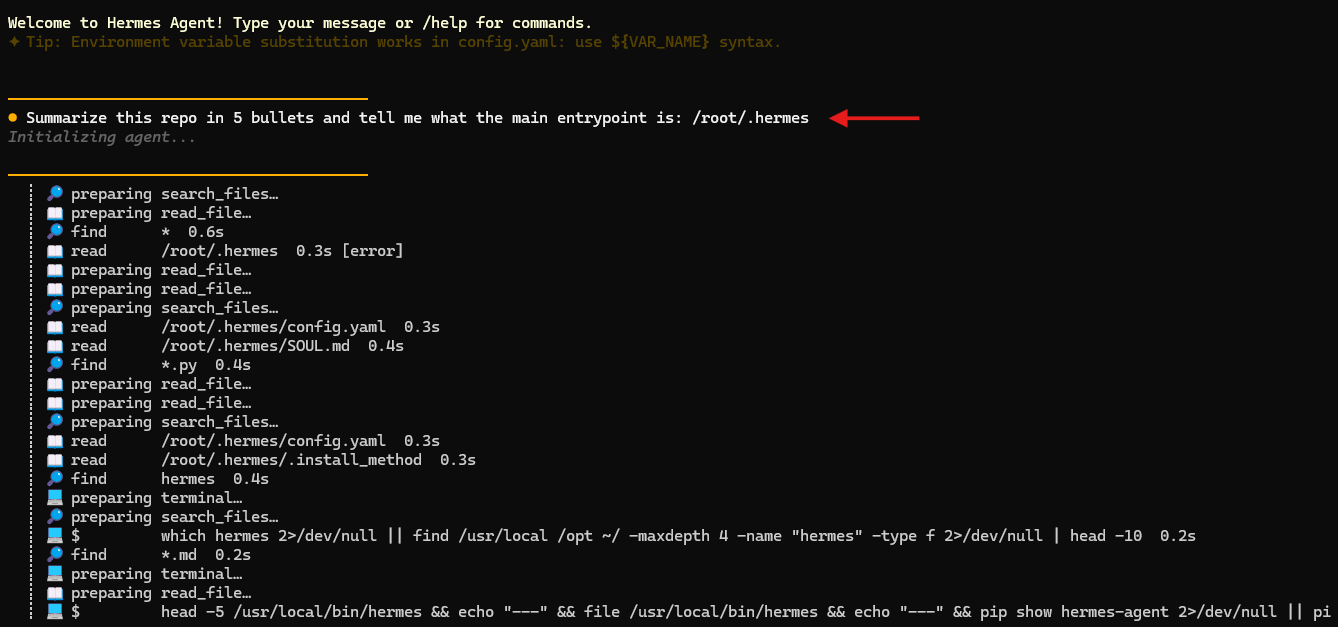
This is exactly the kind of first task you want: safe, observable, and easy to verify. In the screenshot above, Hermes does not just guess. It starts reading concrete files such as config.yaml, SOUL.md, and .install_method, searches for Hermes-related files, and inspects the installed launcher path. That visible tool activity is the real proof that Hermes is behaving like an agent instead of a one-shot chat box.
A healthy result should come back with a concrete summary tied to the workspace and a checkable entrypoint. In this run, Hermes identifies the installed command wrapper at /usr/local/bin/hermes, explains that it leads into the Python CLI entrypoint, and summarizes the surrounding Hermes environment in five bullets.
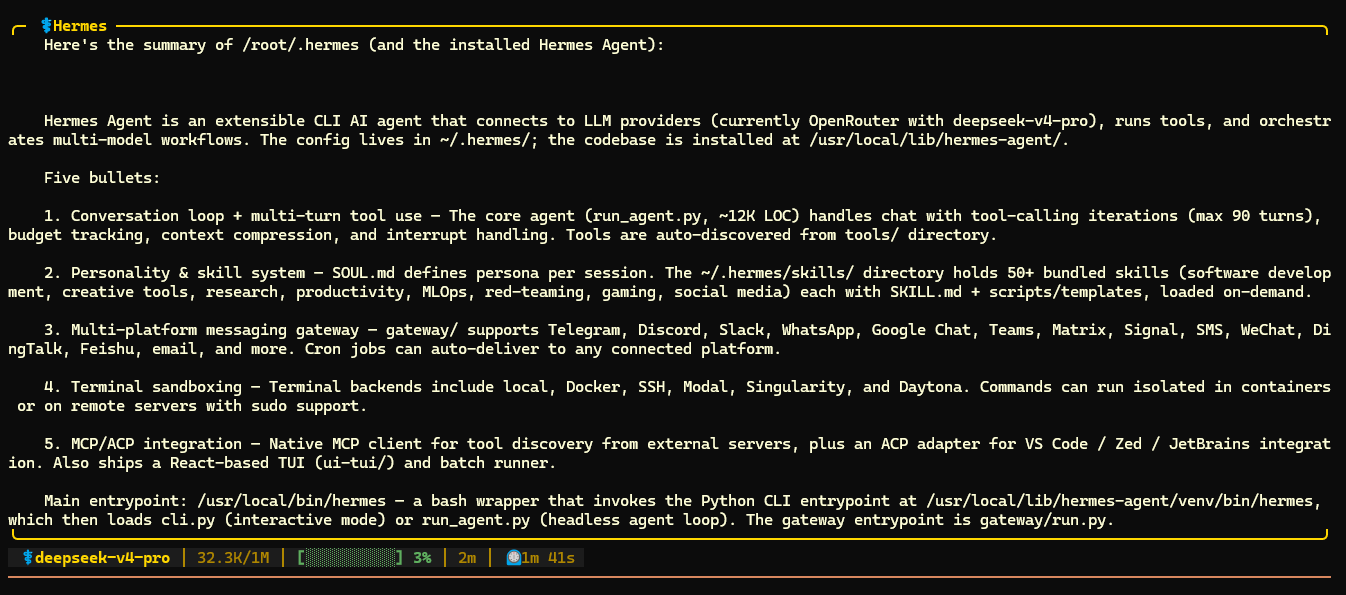
That is the success signal to look for. The answer is specific, grounded in files Hermes actually inspected, and easy to sanity-check against what you can already see on disk. Do not treat the result as magic — compare the summary against the visible files and directory layout. For a first demo, safe and verifiable is much better than flashy.
Resume the session and confirm the setup really works
The quickstart is not finished when Hermes answers once. It is finished when you confirm that the session can be resumed.
Use the resume command below; -c is the short form for the same action:
hermes --continue "<chat_name>"
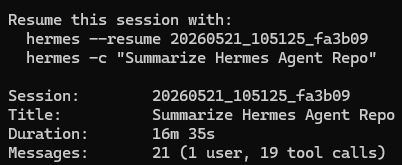
The expected result is that Hermes reopens the most recent session or gives you a recap that clearly belongs to the task you just ran. That matters because it proves Hermes is not acting like a disposable one-shot chat. It is keeping a durable working session you can return to.

Use this compact success checklist before you move on:
- Hermes installed and verified
- Provider configured
- First reply clean
- First repo task completed
- Session resumed successfully
If resume does not work, first make sure you are using the same profile, then check available sessions with hermes sessions list. Once hermes –continue works, you have the full baseline this Hermes Agent tutorial was meant to establish.
What to try next once the base workflow works

Once the base chat is stable, add only one new layer at a time.
💡 Tip: Resist the urge to enable every advanced feature immediately. Get one clean workflow stable first, then expand deliberately.
Here is the short menu of sensible next steps:
- Try hermes –tui if you want the newer terminal interface on top of the same session model.
- Run hermes setup later if you want the broader setup wizard after understanding the basics manually.
- Explore hermes gateway setup if your next goal is messaging-platform integration.
- Review hermes tools and hermes skills when you want controlled capability expansion.
- Move to a Docker or SSH terminal backend if the agent will start touching higher-stakes systems.
- Use the official docs for custom providers and local-model endpoints once the hosted path is already working.
If you want follow-up ideas for real use, here are a few good ones to research next: codebase onboarding notes, changelog drafting, safe refactor planning, config-file explanation, pull request review summaries, VPS housekeeping checklists, deployment runbook drafting, log triage prompts, and documentation gap finding.
For deeper paths, link outward instead of stretching this quickstart into a second article: the quickstart, installation docs, CLI guide, and security guide are the right next stops.
You now have a safe working Hermes quickstart

The important milestone is not that Hermes installed. The important milestone is that Hermes became useful. You now have a verified baseline: the binary is present, the provider is configured, the first reply worked, the first safe task completed, and the session resumed afterward.
That is the right place to stop and take the win. Keep approvals on, expand one layer at a time, and move toward stronger isolation when the agent starts doing higher-stakes work. If you eventually run Hermes on a personal workstation, a lab box, or a VPS from AlexHost, or anywhere else, the rule stays the same: earn trust in small steps.