How to Upload an SSH Public Key to an Existing VPS
AlexHost using SSH keys is one of the most secure and efficient ways to handle authentication. If you have an existing VPS and want to switch to using SSH keys (or add a new key), it’s a straightforward process that improves security by allowing passwordless login. In this guide, we’ll walk you through how to upload an SSH public key to an existing VPS, ensuring that future logins are secure and simple.
Why Use SSH Keys?
SSH keys are widely used for securing access to remote servers. They offer several advantages over traditional passwords:
- Stronger Security: SSH keys use cryptographic authentication, which is significantly harder to crack than even strong passwords.
- Passwordless Login: Once set up, SSH keys allow you to log into your server without typing a password.
- Protection Against Brute Force Attacks: By eliminating passwords, SSH keys prevent brute force attacks aimed at guessing login credentials.
Prerequisites
Before you begin, you’ll need:
- Access to your existing VPS: This means you can currently log into the VPS using SSH, likely with a password.
- An SSH key pair: If you don’t have one, we’ll cover how to generate it.
- Basic knowledge of SSH commands: Familiarity with the command line interface (CLI) is required.
Step 1: Generate an SSH Key Pair (If You Don’t Have One)
If you don’t already have an SSH key pair on your local machine, you can create one. Here’s how:
Open a terminal on your local machine (macOS or Linux) and run the following command:
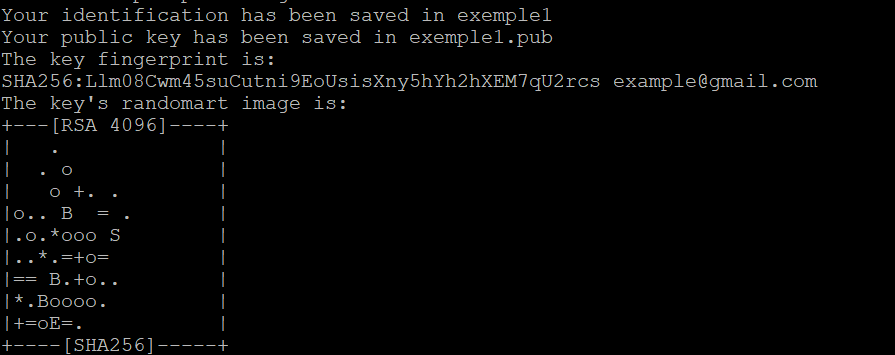
This command will create a 4096-bit RSA encryption key pair. During the process, you’ll be asked where to save the key:
- Press Enter to save the key to the default location (~/.ssh/id_rsa).
- Optionally, add a passphrase for an extra layer of security (recommended), or press Enter to skip this step.
This process generates two files:
- id_rsa: Your private key (keep this secure and never share it).
- id_rsa.pub: Your public key (this is what you’ll upload to the server).
Next, display the public key so you can copy it:
ssh root@your_vps_ipCopy the output (your public key), as you’ll need it in the next step.
Step 2: Log into Your VPS
To add your new SSH public key to the virtual machine, you’ll need to log into it using the current method (either with a password or an existing key). Open your terminal and run:
Replace your_vps_ip with the actual IP address of your VPS. If you’re logging in with a different user account (not root), replace root with the appropriate username.
Step 3: Create the .ssh Directory (If It Doesn’t Exist)
Once logged in, ensure that the .ssh directory exists for the user account you’re using. If it doesn’t exist, create it with the following command:
This command creates the .ssh directory and sets the correct permissions so that only the current user can access it.
Step 4: Add the Public Key to the authorized_keys File
Now that you have the .ssh directory in place, you need to upload your SSH public key to the VPS by adding it to the authorized_keys file. This file contains the public keys that are allowed to authenticate against the server.
- Open the authorized_keys file using a text editor, such as nano:
If the file doesn’t exist, this command will create it.
- Paste your public SSH key (the one you copied from id_rsa.pub earlier) into the file. Right-click or use the terminal’s paste function to insert the key.
- Save and close the file by pressing Ctrl + X, then Y, and hit Enter.
- Set the correct permissions on the authorized_keys file:
This step ensures that the file is accessible only to the current user.
Step 5: Test the SSH Key Login
After adding your SSH key to the VPS, you should test the setup to ensure that you can log in without a password.
- Log out of the current SSH session by typing:
- Now, try logging back into the VPS using your SSH key:
If everything is set up correctly
- , you will be logged into the VPS without being prompted for a password.
Step 6 (Optional): Disable Password Authentication
For additional security, you can disable password-based authentication, allowing only users with an SSH key to access the VPS. This step is optional but recommended for environments where security is a priority.
To disable password authentication:
- Open the SSH configuration file on your VPS:
- Find the following lines in the configuration file and make sure they are set as follows:
- Save and close the file by pressing Ctrl + X, then Y, and hit Enter.
- Restart the SSH service to apply the changes:
Now, only users with a valid SSH key will be able to log into the VPS.
Step 7: Managing Multiple SSH Keys
If you manage multiple VPS or remote servers, you may want to organize your SSH keys and configure your ~/.ssh/config file for convenience. Here’s an example configuration that allows you to specify different SSH keys for different servers:
After adding this to your SSH config file (~/.ssh/config), you can simply log in with:
Conclusion
Adding an SSH public key to an existing VPS significantly enhances the security of your remote server while simplifying the login process. By following this guide, you can easily upload your SSH public key and configure your VPS for passwordless login. For added security, consider disabling password authentication entirely, ensuring that only authorized SSH keys can access your VPS. This setup not only protects your server from unauthorized access but also streamlines your workflow by eliminating the need to enter passwords each time you log in.


