 English
 Русский
  Română
  Deutsch
  Français
  Türkçe
  Español
  Português
  Українська
  български
  Polski
  Indonesia
  中文 (中国)


How to Install ZeroClaw: Beginner-Friendly Quickstart for a Lightweight OpenClaw Alternative
Why ZeroClaw is worth installing
If you have ever installed an AI tool, watched the binary land in your “PATH”, and still had no proof that it could reach a model, understand its workspace, or answer safely, you already understand the problem this guide is solving. A finished install only proves files were copied. It does not prove the agent runtime is usable.

That is where ZeroClaw becomes interesting. It is a lightweight AI agent runtime built around a single Rust binary, with support for hosted model providers instead of a heavy local stack on day one. In practice, that means it is closer to “a controlled tool-using runtime” than “a chatbot in a terminal.” For readers who are curious about the “OpenClaw alternative” angle, the practical appeal is not hype or benchmarks. It is the lighter install story, lower dependency weight, and the fact that testing it on an Ubuntu VPS feels manageable instead of turning into a full infrastructure project.
This article stays tightly focused on one outcome: install ZeroClaw, run “zeroclaw onboard”, verify a safe first CLI session, and leave with a realistic idea of what to try next. That is the right first milestone for a beginner-friendly VPS walkthrough, because “working” should mean a grounded first response you can check, not a long feature tour.
📝 Note: This guide proves first working CLI use. It is not a production deployment guide, and it does not try to cover Docker, public gateways, or background services
What ZeroClaw is — in plain English

ZeroClaw is better understood as an agent runtime than as “an AI chatbot.” The model is only one part of the system. ZeroClaw is the layer that connects a provider account, a model choice, an agent profile, and a bounded workspace so the tool can do more than answer one prompt in isolation.
The four terms below are the ones that matter most in this tutorial:
| Term | Plain-English meaning | Why it matters in this guide |
|---|---|---|
| provider 🌐 | The service source behind the model | zeroclaw onboard needs one before the agent can talk to anything |
| model 🤖 | The specific model you choose from that provider | A wrong or stale model choice can break validation later |
| agent alias 🕵️ | The name of your agent profile | You use it when you launch zeroclaw agent -a <alias> |
| workspace 🏢 | The directory ZeroClaw is allowed to work in | It defines the “room” the agent can inspect during the first test |
That workspace idea matters more than it sounds. In this article, the workspace is the room the agent is allowed to work in. That is why installing ZeroClaw is not the same as configuring ZeroClaw: the binary can exist on disk while the provider, model, alias, and workspace are still missing or miswired.
📝 Note: A successful install is only half the story. The meaningful milestone is a working configuration under ~/.zeroclaw that can reach a provider and operate inside a visible workspace.
This is also the cleanest way to explain why some people look at ZeroClaw as an OpenClaw alternative without forcing a full comparison. The value is not “OpenClaw rewritten in Rust,” and this guide does not treat it that way. The value is a lighter self-hosting posture, provider flexibility, and a single-binary runtime that is easy to try on a VPS.
Good first use cases are equally grounded: summarizing a safe repo copy, explaining a config file, handling a read-only helper task inside a low-risk workspace, or using it as a bounded assistant for operators who want visibility before they allow any real changes.
Before you install: Ubuntu baseline, prerequisites, and safety

Before you run the installer, spend one minute confirming that the VPS is actually a good fit for the path this article uses. The minimum requirements are straightforward: SSH access to an Ubuntu VPS, curl, one hosted provider account with an API key, and a low-risk machine or workspace for the first session.
Run the below checks first. In the validation run shown in the screenshots, they returned Ubuntu 24.04.4 LTS (Noble Numbat), x86_64, and /usr/bin/curl. That is enough to confirm the guide’s baseline without pretending every server will return identical output.
cat /etc/os-release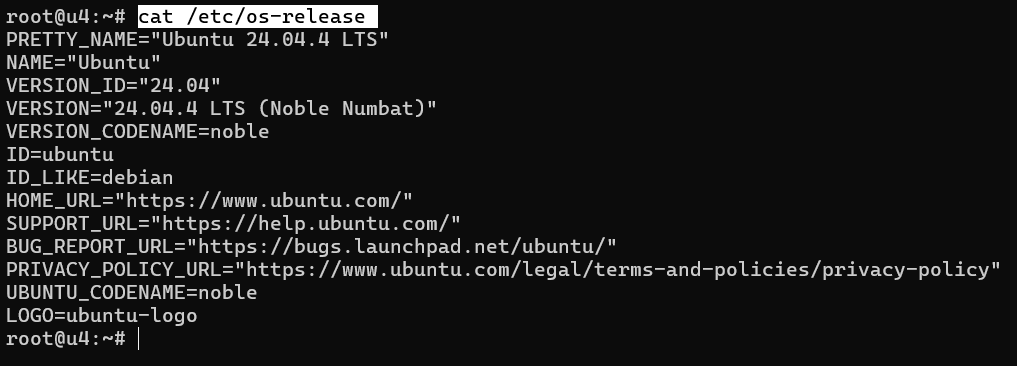
uname -m
command -v curl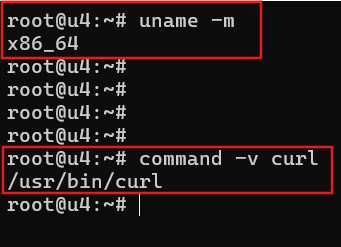
For the hosted-provider example, OpenRouter is the cleanest default because it keeps the walkthrough VPS-friendly and avoids local model setup on the server. If you already use another supported provider, that is fine, but have the API key ready before zeroclaw onboard starts asking questions. The goal here is first success, not provider shopping, so one clean hosted path is better than trying to evaluate every provider in the same sitting.
ZeroClaw supports both prebuilt and source installation paths. Think of the prebuilt route as a ready-made appliance and the source route as a build-it-yourself kit. Both are legitimate, but they serve different readers. For this quickstart, the important thing is to understand the difference now and make the actual recommendation in the install step.
⚠️ Warning: Use this first-run checklist before you move on:
- stay in a low-risk workspace
- keep the default supervised behavior
- avoid public exposure and production data
- make the first task read-only on purpose
Install ZeroClaw with the official script
With the preflight out of the way, use the official installer as the main path. This is the shortest supported route for an Ubuntu VPS quickstart:
curl -fsSL https://raw.githubusercontent.com/zeroclaw-labs/zeroclaw/master/install.sh | bashOn this install path, the script runs non-interactively and takes the pre-built release path automatically. In the validation run for this guide, it detected the Linux target, downloaded the matching GitHub release tarball, verified the checksum, installed the web dashboard assets under ~/.local/share/zeroclaw/web/dist, and placed the zeroclaw binary in ~/.cargo/bin. Because the screenshots were captured from the root account, the concrete paths shown are /root/.local/share/zeroclaw/web/dist, /root/.cargo/bin/zeroclaw, and /root/.bashrc; on a regular user account, expect the same layout under your own home directory.
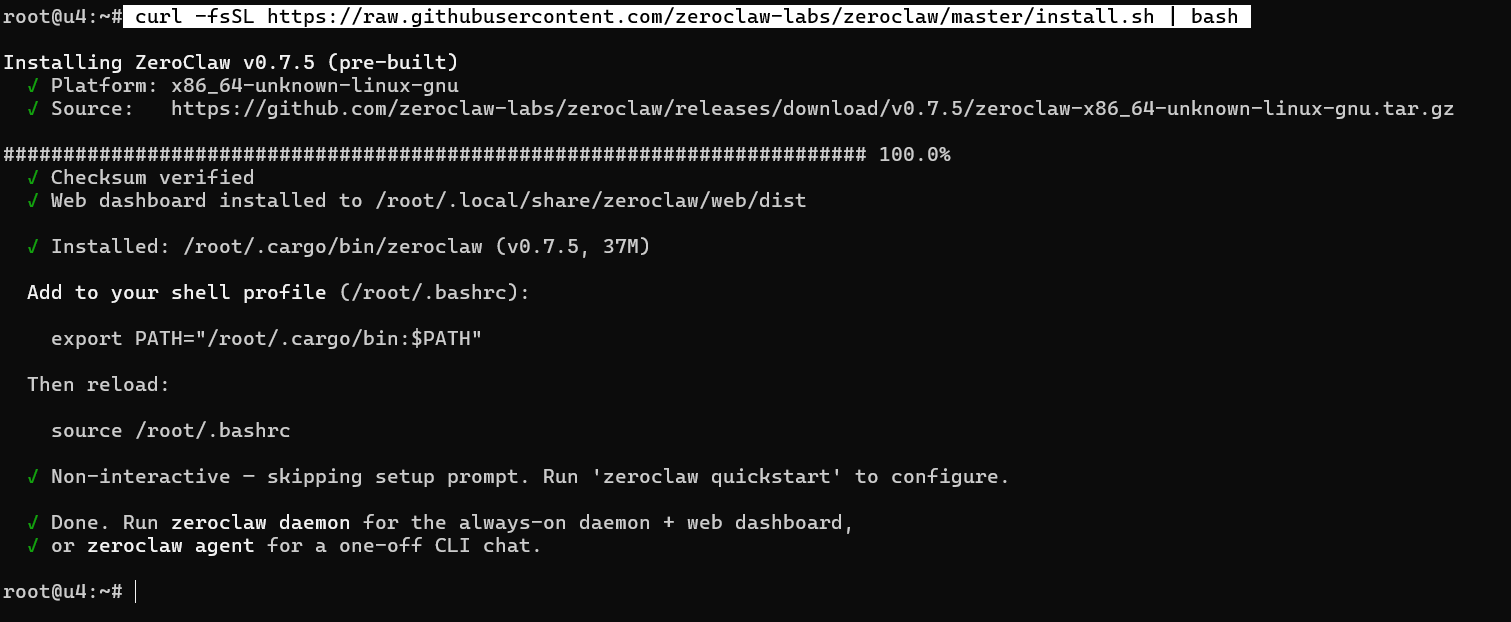
That fast path is not a shortcut or a less official install. It is the normal quickstart route for the audience this guide is written for: download the matching release, verify it, and place the binary in ~/.cargo/bin/zeroclaw. If you intentionally want a source build, use the repo-clone path below instead of expecting this installer flow to stop and offer a separate build choice.
💡 Tip: On Linux, the most common post-install issue is PATH, not the install itself. Follow the installer’s suggestion to add export PATH=”$HOME/.cargo/bin:$PATH” to your shell profile and reload it with source ~/.bashrc (or reopen the shell). If you only need a temporary fix for the current session, use the one-line export shown below.
After the binary is in place, the script finishes with a non-interactive confirmation message instead of launching setup automatically. In the validation run for this guide, that closing message pointed to zeroclaw quickstart, but the installed “v0.7.5” binary exposed onboard as the actual setup subcommand in zeroclaw –help. It also points out that zeroclaw daemon is the path for the always-on daemon plus web dashboard while zeroclaw agent is the one-off CLI chat path.
For this article, continue with zeroclaw onboard next. That keeps the walkthrough aligned to the article’s actual promise: first working agent session in the terminal, not dashboard pairing or always-on runtime.
If you are security-conscious and prefer to inspect the installer before running it, use this alternative approach:
git clone https://github.com/zeroclaw-labs/zeroclaw.git
cd zeroclaw
./install.sh
Before you think about providers or prompts, verify that the binary is callable in the shell:
zeroclaw --version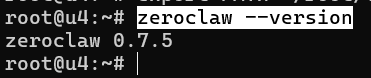
If that works, the install itself succeeded. If the shell says command not found, apply the temporary PATH fix below and test again:
export PATH="$HOME/.cargo/bin:$PATH"Separating this step from configuration matters. A working zeroclaw –version tells you the installer problem is solved before you begin debugging provider setup.
Run zeroclaw onboard and check what it created
This is the point where “installed” needs to become “configured”. On the non-interactive install path used above, the script explicitly skips the setup prompt. If the installer message mentions zeroclaw quickstart but the binary does not recognize it, trust zeroclaw –help and start the first-run wizard with:
zeroclaw onboard
The wizard opens on the workspace screen. In the captured run, the default workspace path was /root/.zeroclaw/workspace. Unless you have a strong reason to move it, accept the default. On a non-root account, the same layout will live under your own home directory.

For this beginner CLI walkthrough, leave multi-workspace profiles disabled. Turning them on creates separate memory, secrets, and audit directories per engagement, which can be useful later, but it adds extra mental overhead for a first smoke test.
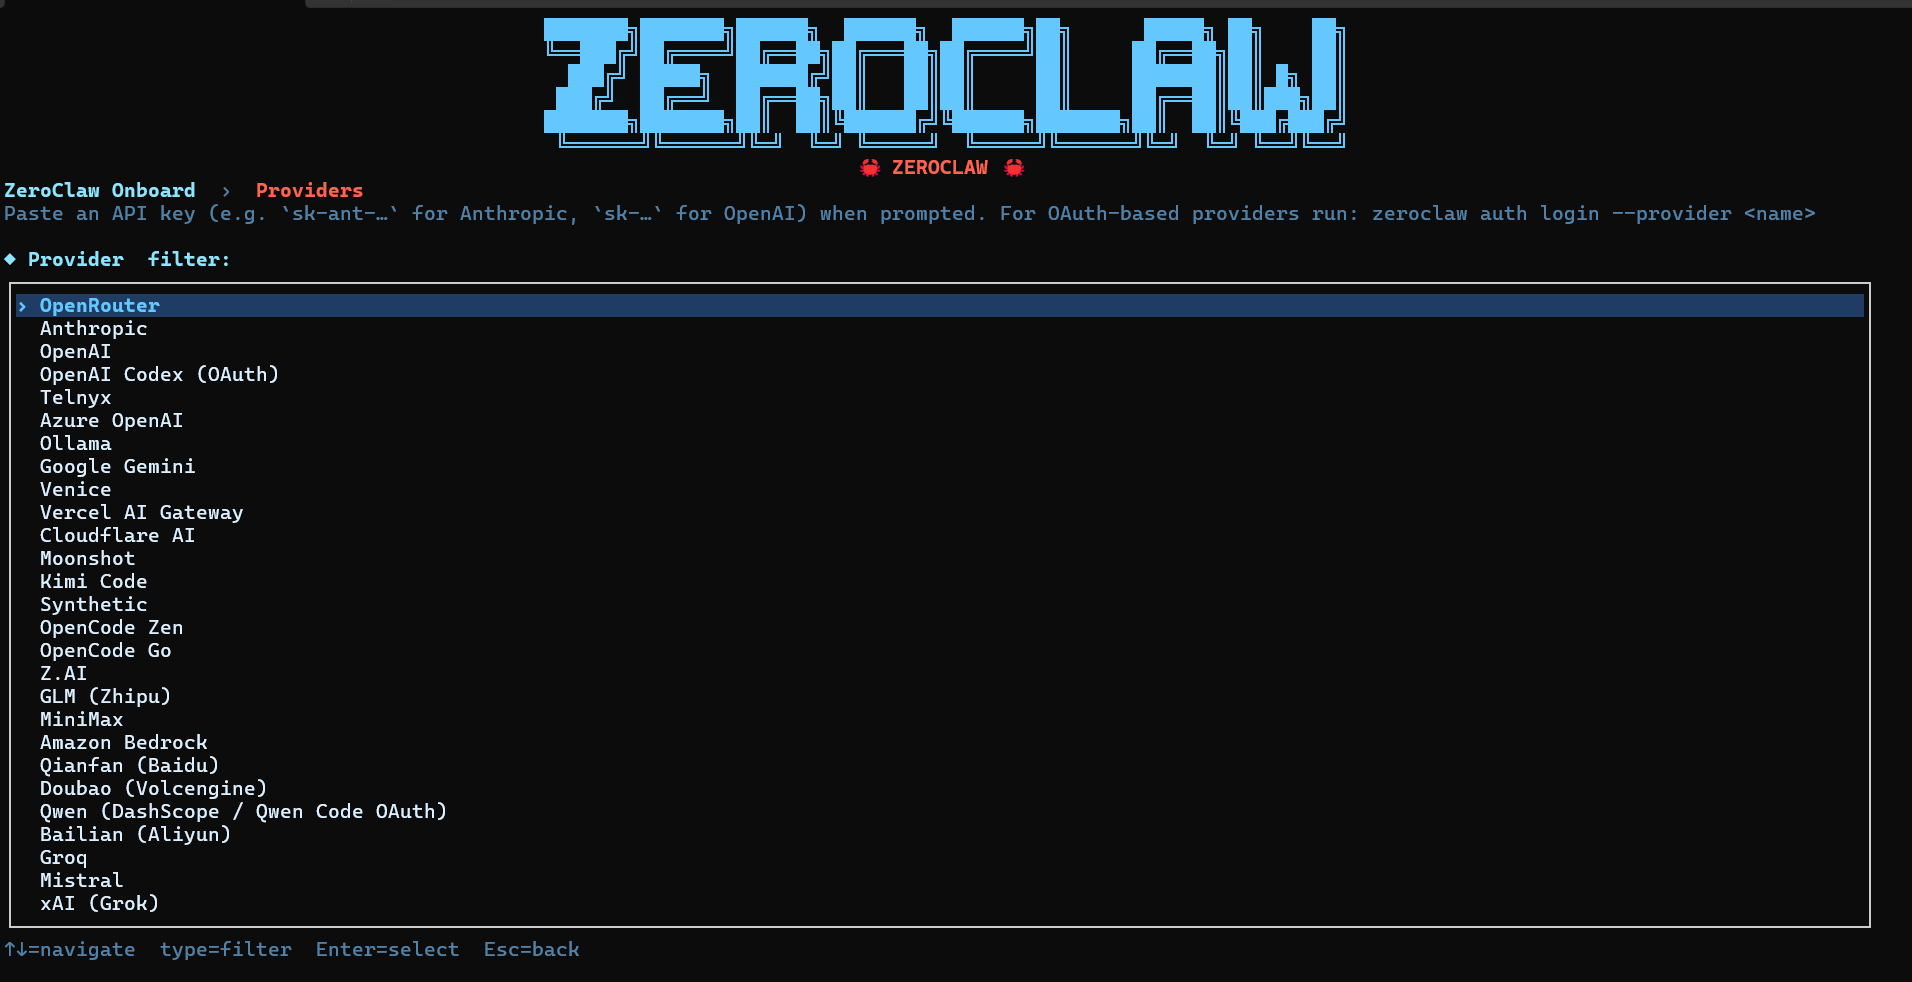
On the provider screen, choose OpenRouter. The list is much larger than a beginner guide needs, which is exactly why it helps to pick one clean hosted path and stick to it for the first run.

Paste your OpenRouter API key when prompted. The input is hidden, and the prompt explicitly notes that ZeroClaw stores the secret via the OS keyring when possible instead of asking you to hard-code it into config.toml.
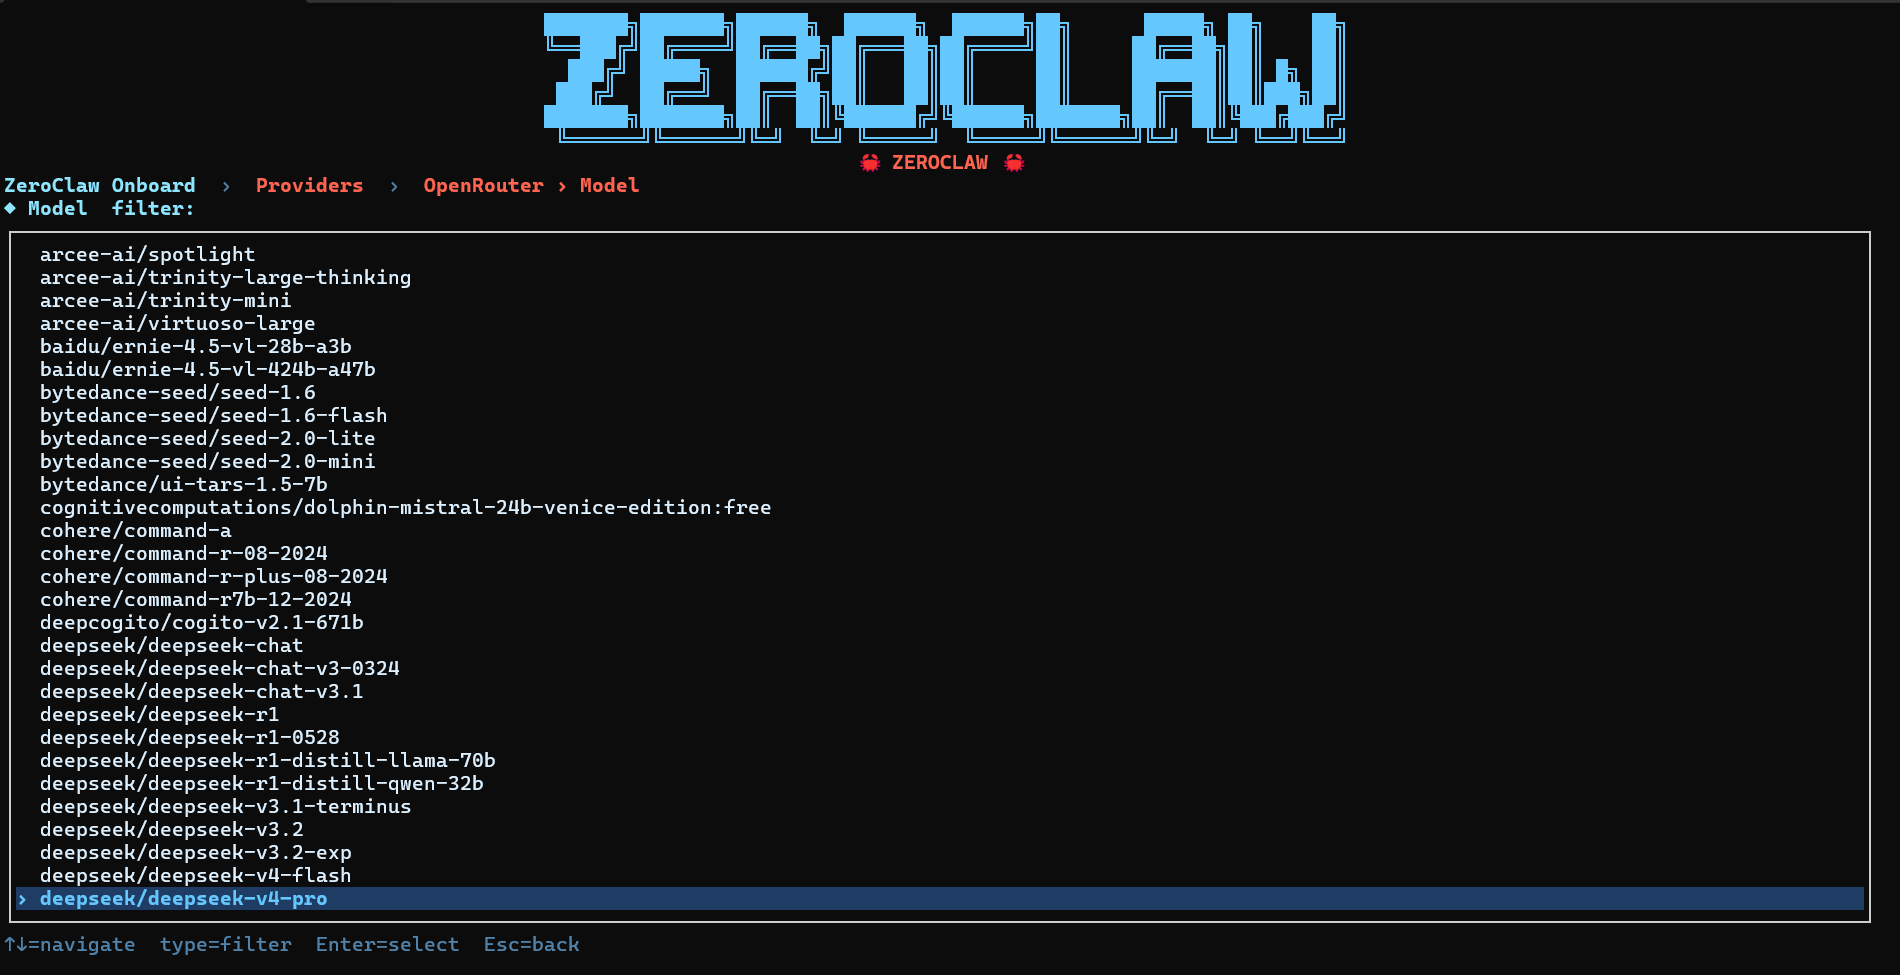
The OpenRouter model list is long. In the captured run, deepseek/deepseek-v4-pro was selected. You can choose another current OpenRouter model if you prefer, but the rest of this walkthrough follows that exact selection.

When the wizard asks about advanced settings, leave them off for this guide. Turning them on is for targeted overrides such as temperature, timeout, base URL, or wire protocol.
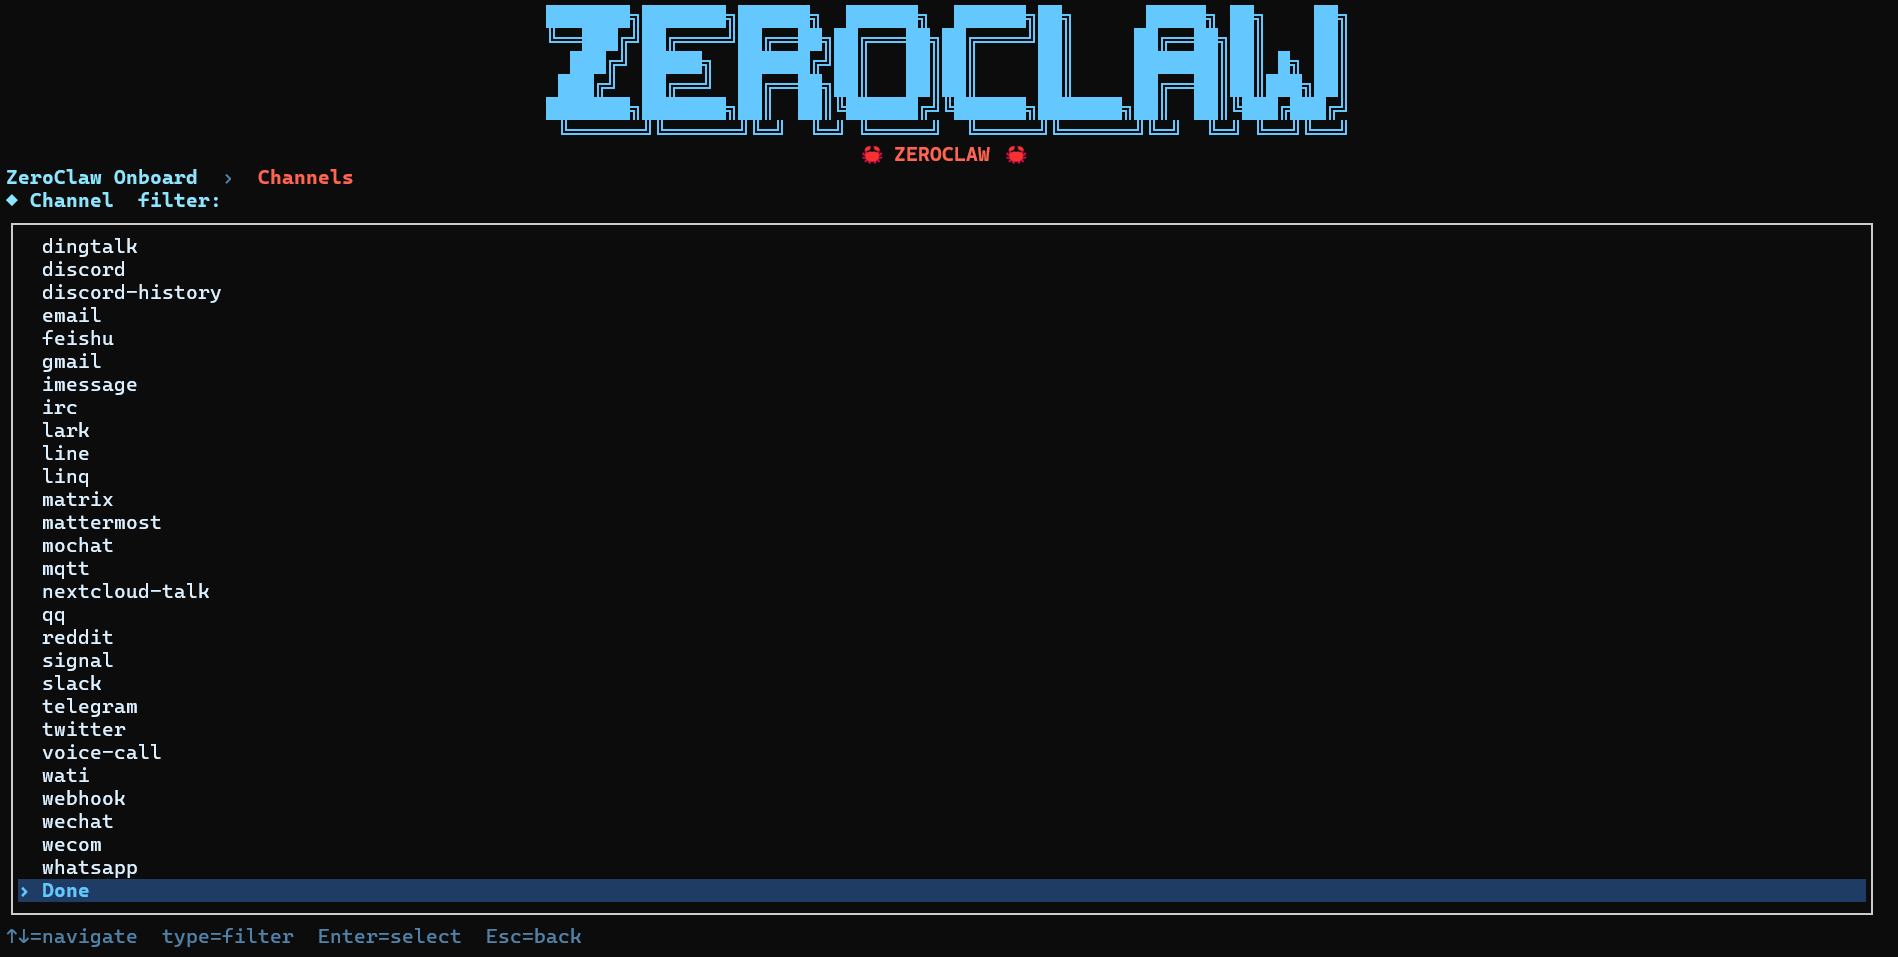
On the Channels screen, select Done without adding Discord, Telegram, Slack, or any other external surface. That keeps the first validation CLI-only. You can add channels later once the local agent path works.

For memory, choose SQLite with Vector Search (recommended). It is the strongest default here because it keeps everything local while still giving you hybrid search and embeddings support.

Leave auto-save set to Yes so your own prompts are recorded as conversation history. If you later want stricter manual control, you can turn this off and only save memory explicitly.

Leave hardware control disabled. This VPS setup does not need GPIO, USB-tethered boards, or debug probes.

For the public tunnel provider, keep it at none. That matches the safety posture of this article: no public exposure during the first smoke test.
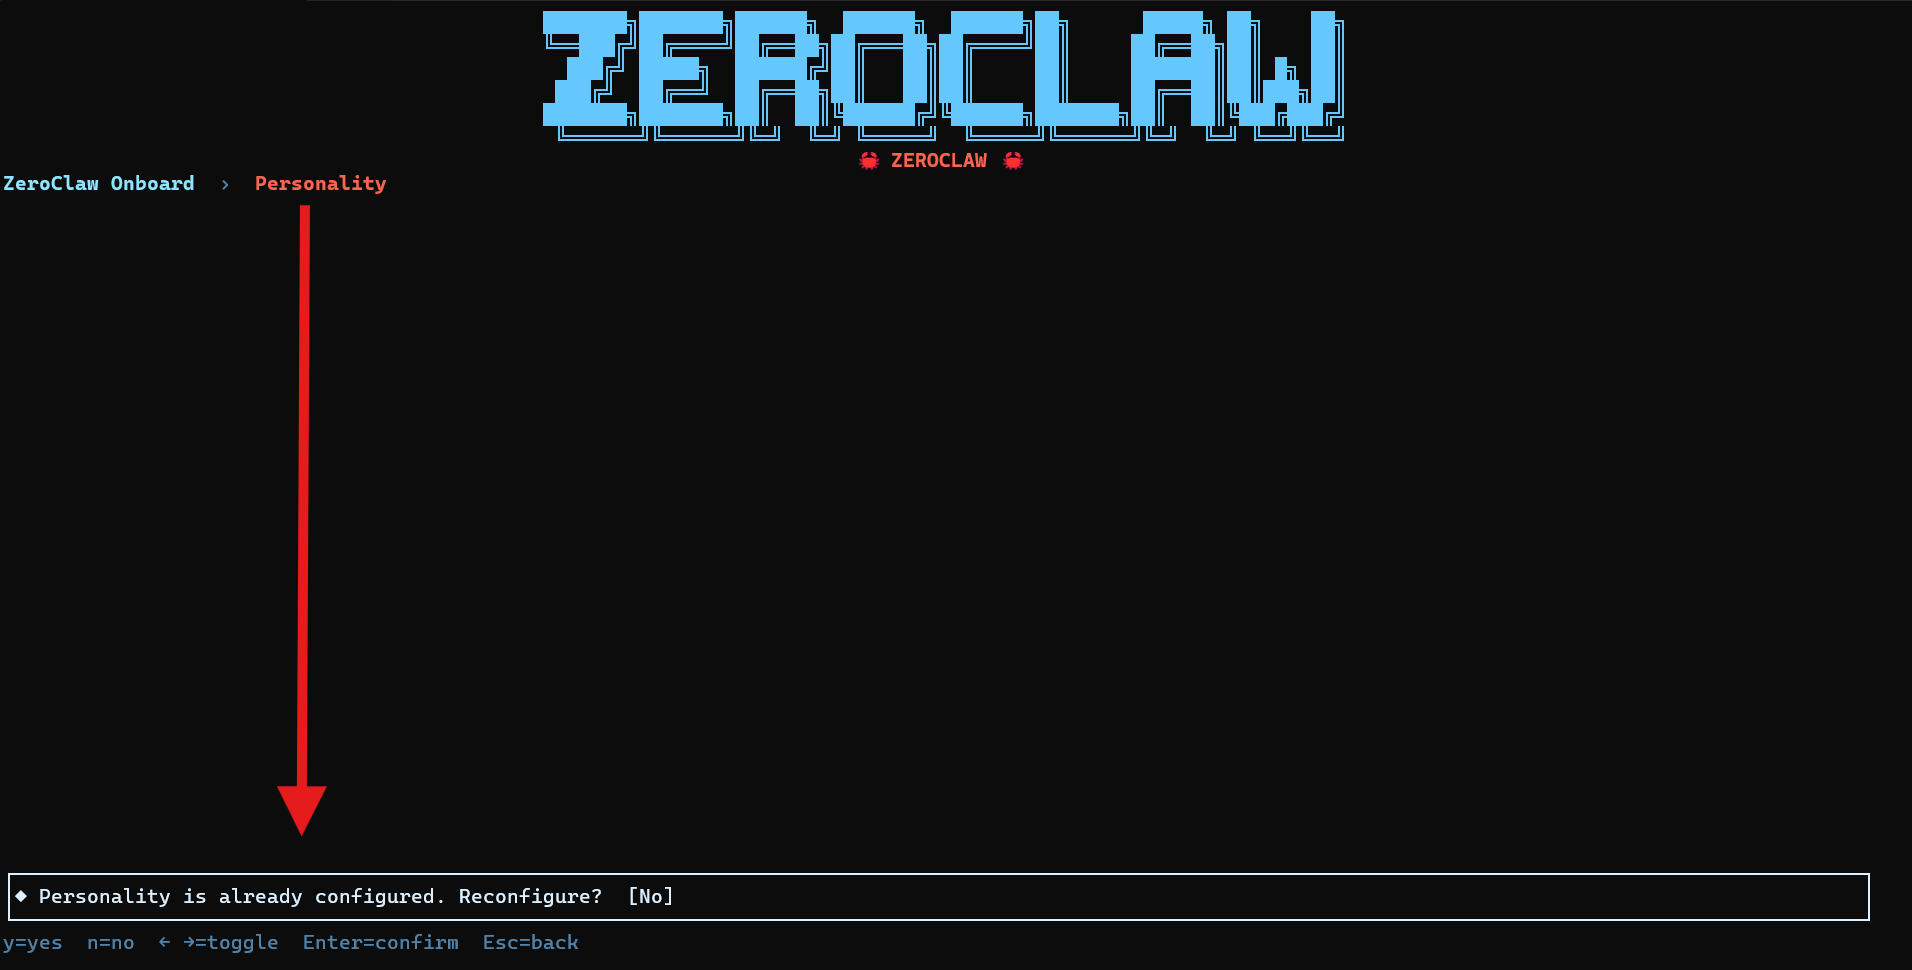
When the Personality step says it is already configured, leave Reconfigure? at No. The default personality is enough for first-run validation.
What matters here is not memorizing every wizard panel. What matters is the path the screenshots prove: single workspace, OpenRouter provider, hidden API key entry, a concrete model choice, no advanced overrides, no extra channels, local SQLite memory, auto-save on, hardware off, no public tunnel, and no personality rewrite. That is more than enough to produce a usable first CLI configuration under ~/.zeroclaw.
After onboarding finishes, confirm that the main config directory and workspace exist:
If the onboarding run completes cleanly, you should drop back to the shell with a config-loaded message like the one below:

ls ~/.zeroclaw
ls ~/.zeroclaw/workspace
In the captured run, ~/.zeroclaw contained config.toml and workspace/, and the workspace itself showed IDENTITY.md and SOUL.md.
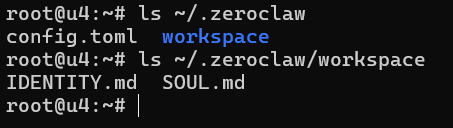
That is already enough to prove ZeroClaw now has an operating room, not only an installed binary. That is also why the workspace analogy is useful: you are checking that the room exists, that the agent has context inside it, and that the setup moved beyond “the installer finished.” Files such as IDENTITY.md and SOUL.md are not decorative. They are part of the context ZeroClaw uses to understand how it should behave inside that workspace.
Before the first live prompt, run a compact health check:
zeroclaw status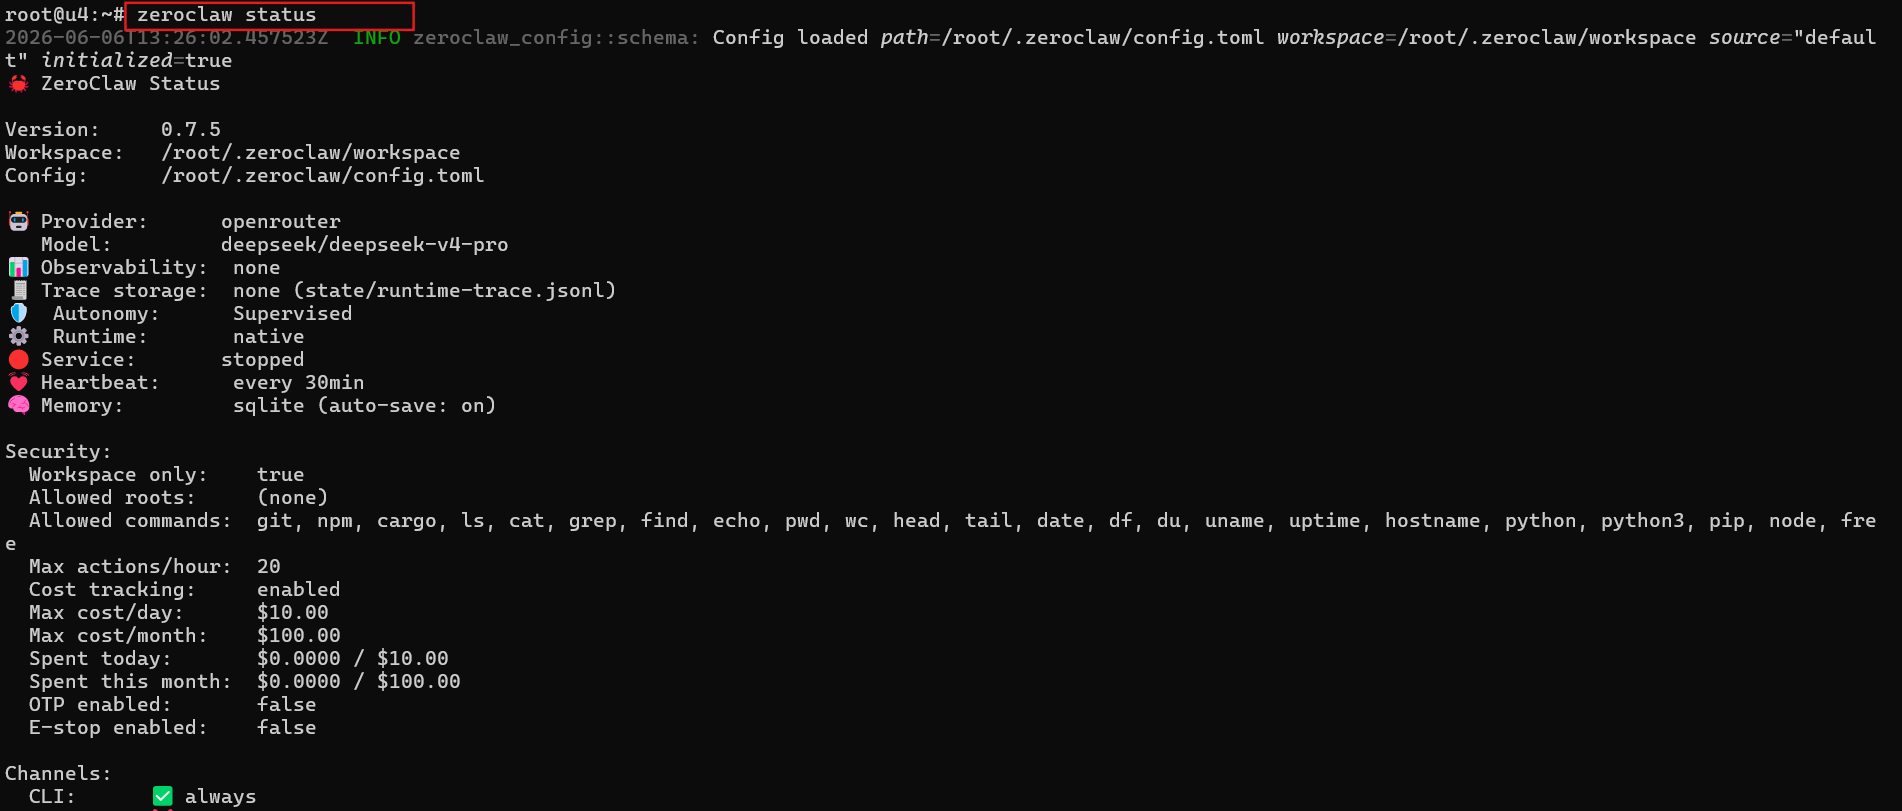
zeroclaw doctor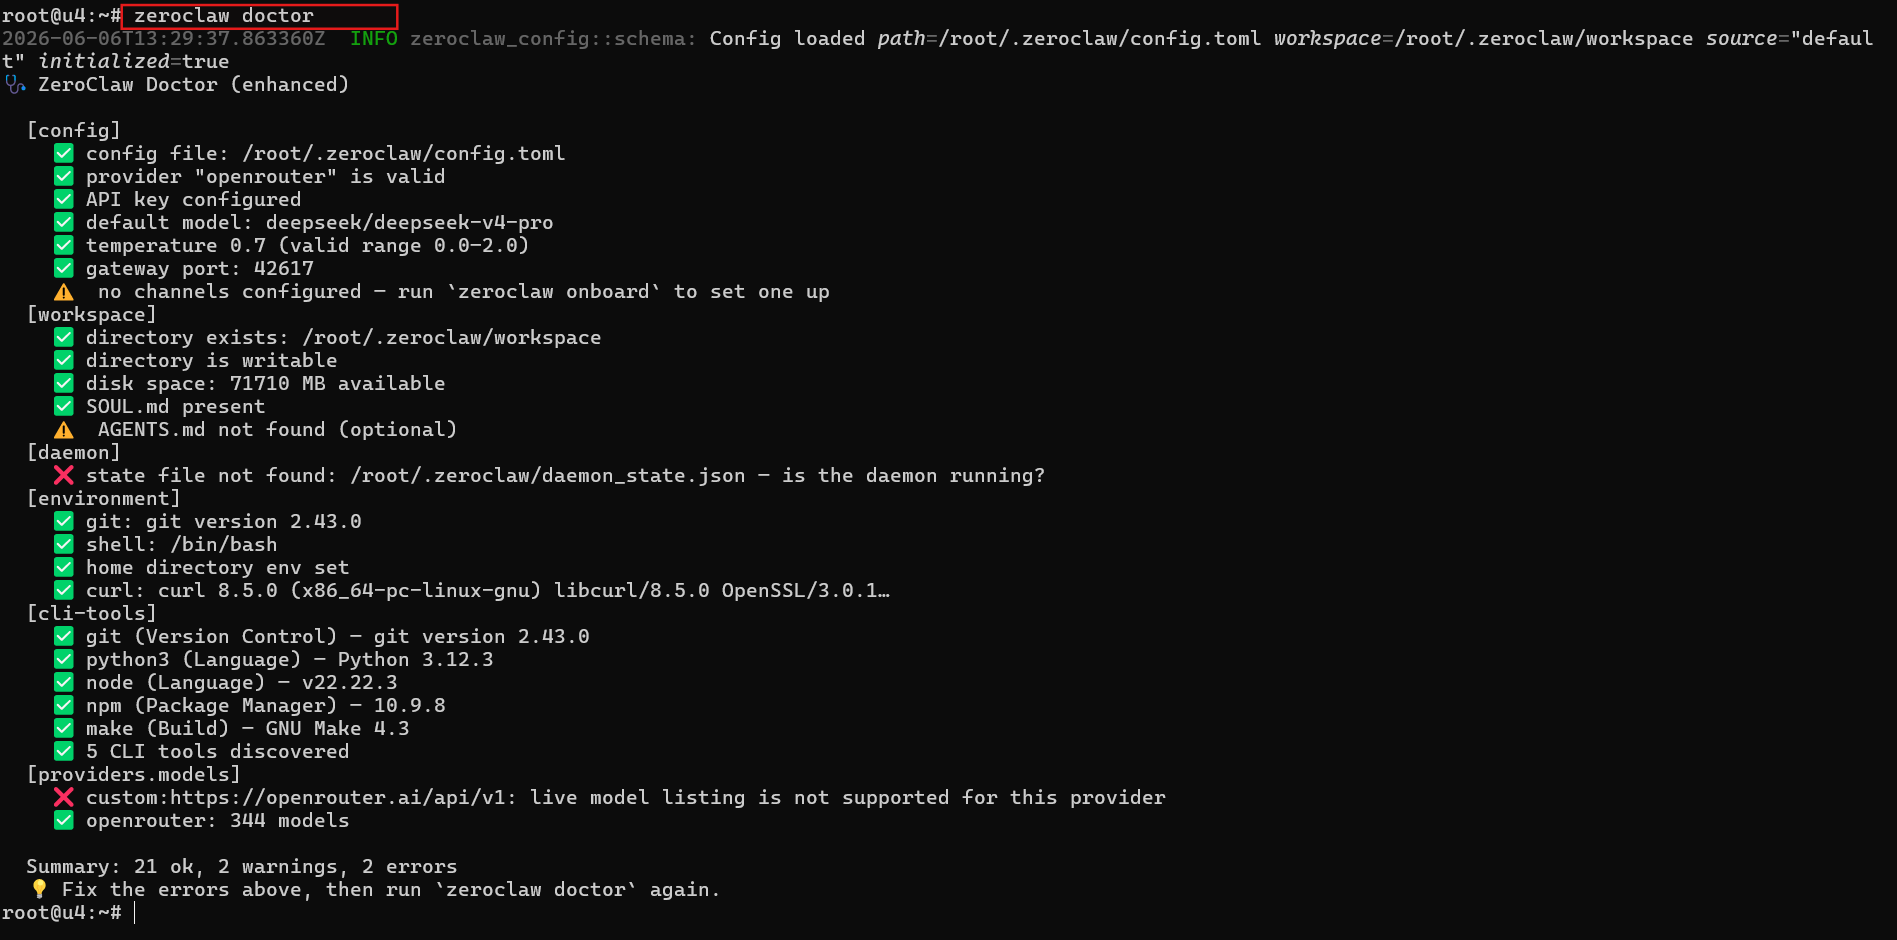
For this first CLI-only smoke test, do not panic if zeroclaw doctor is not perfectly clean. In the captured run, the important checks passed: the config file was found, the openrouter provider was valid, the API key was configured, the default model was set, and the workspace existed and was writable.
The remaining warnings and errors are not critical for a terminal chat: “no channels configured” is expected because the walkthrough intentionally skipped Discord, Telegram, and other external channels; AGENTS.md not found (optional) is explicitly non-blocking; daemon_state.json not found only means the always-on daemon is not running yet; and the OpenRouter live-model-listing complaint is better read as a probe limitation than proof that provider setup failed, especially because the output still reports openrouter: 344 models.
grep -E 'default_provider|default_model|\[agents\.|\[risk_profiles\.' ~/.zeroclaw/config.toml
The success signal here is operational, not cosmetic. zeroclaw status is the clearest source of truth for the active runtime summary, zeroclaw doctor tells you whether anything important is broken, and the grep output is best treated as a rough peek into provider/model-related config entries rather than a perfect one-line validation. Expect wording and exact matches to vary by version. You are not looking for a perfect wall of green text. You are looking for the absence of first-run blockers and the presence of real configuration data.
📝 Note: config.toml may not show your API key in plaintext. That can be normal. In the captured onboarding run, the API key prompt explicitly said the secret would be stored via the OS keyring when possible, so “no visible key in the TOML file” is not the same thing as “setup failed.”
Start the first safe CLI chat
With the config and workspace in place, launch the agent in interactive mode:
zeroclaw agent
In the captured run, ZeroClaw loaded the config, initialized SQLite-backed memory, printed the interactive-mode banner, and dropped to the > prompt. The goal is not to start a flashy demo. The goal is to prove end-to-end connectivity, valid configuration, and grounded workspace awareness in one low-risk step. A read-only test gives you far more useful signal at this stage than a write-capable “look what it can do” prompt.
For the first prompt, use this exact read-only check:
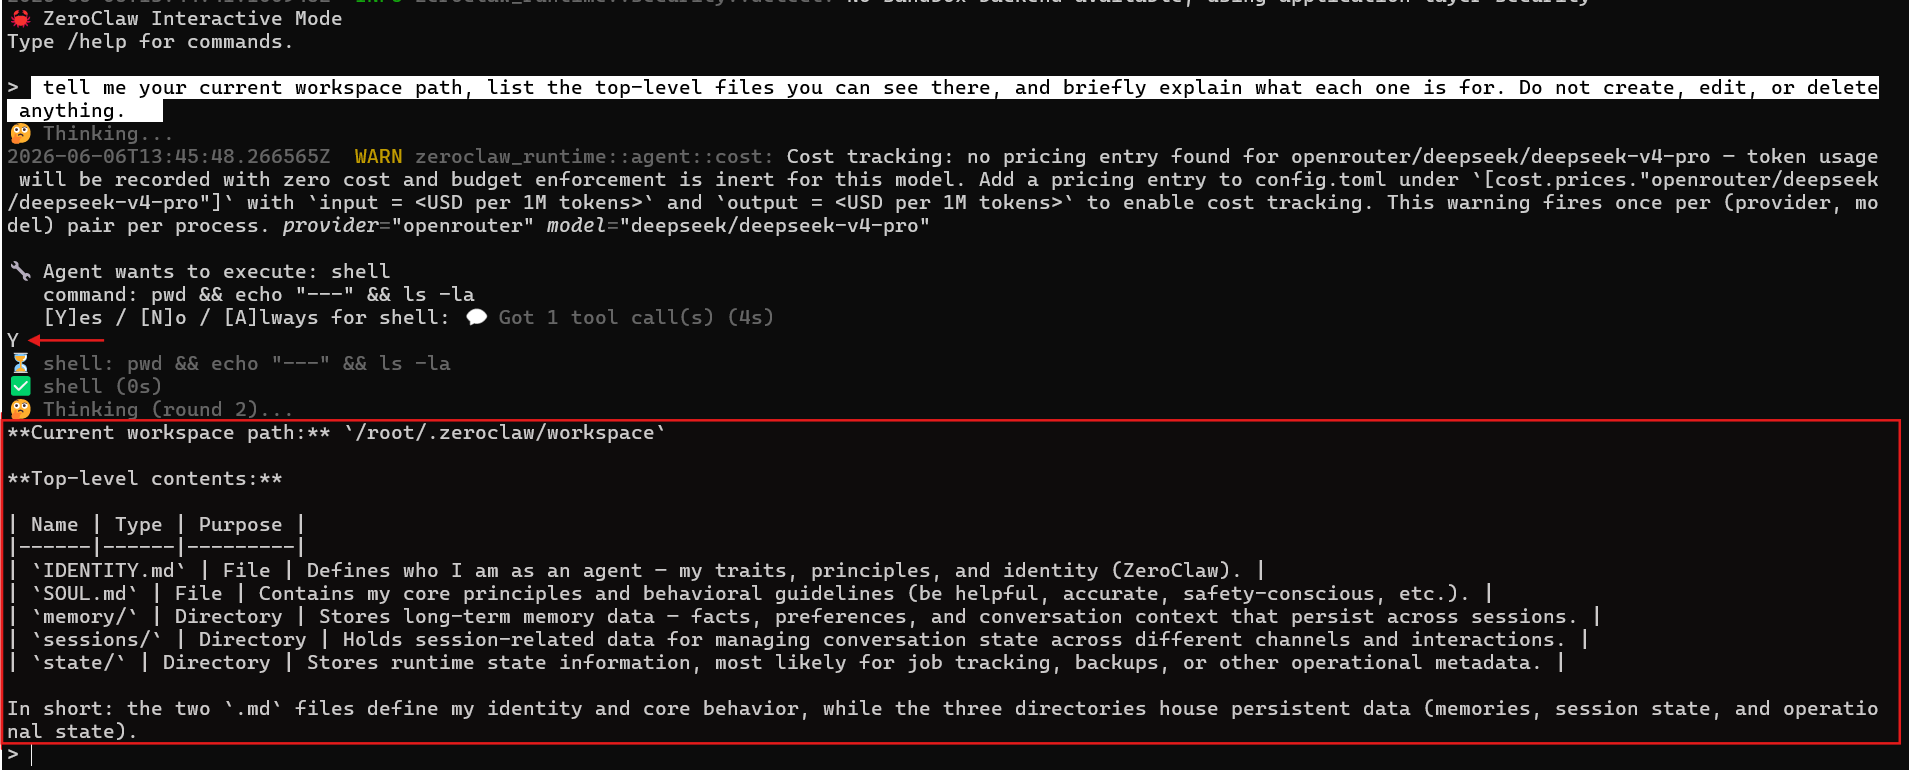
tell me your current workspace path, list the top-level files you can see there, and briefly explain what each one is for. Do not create, edit, or delete anything.
Because the runtime is in supervised mode, the first useful reply may require a tool approval. In the captured run, ZeroClaw asked to execute a read-only shell command: “pwd && echo “—-” && ls -la”
That is exactly the kind of command you want for this smoke test: it prints the workspace path and lists the top-level contents without changing anything. Approve it with Y for a one-time yes. You could also deny it with N, but then the agent would lose the easiest way to answer the question from real filesystem state instead of guessing.
📝 Note:You may also see a cost-tracking warning for the selected OpenRouter model before the approval prompt. In the captured run, ZeroClaw warned that no pricing entry was defined for openrouter/deepseek/deepseek-v4-pro. That does not block the chat itself. It only means token usage may be recorded with zero cost until you define model pricing explicitly.
This prompt is strong because it tests three things at once. First, ZeroClaw has to reach the provider and get a response back. Second, the agent has to understand the configured workspace. Third, the answer has to be specific enough that you can compare it against what is actually on disk. In other words, this proves the agent is staying inside the room it was given.
A good first reply should meet four conditions:
- no authentication or provider errors
- no “config not found” or missing-model failures
- the correct workspace path appears in the answer
- real top-level files are named, with no claim that anything was changed
If you want a different way to invoke the agent, you can send the same prompt as a one-shot command instead of staying in the interactive session. Treat this as optional, not the main walkthrough. The interactive path is still the better first experience because it makes the runtime feel observable instead of magical.
zeroclaw agent -m "tell me your current workspace path, list the top-level files you can see there, and briefly explain what each one is for. Do not create, edit, or delete anything."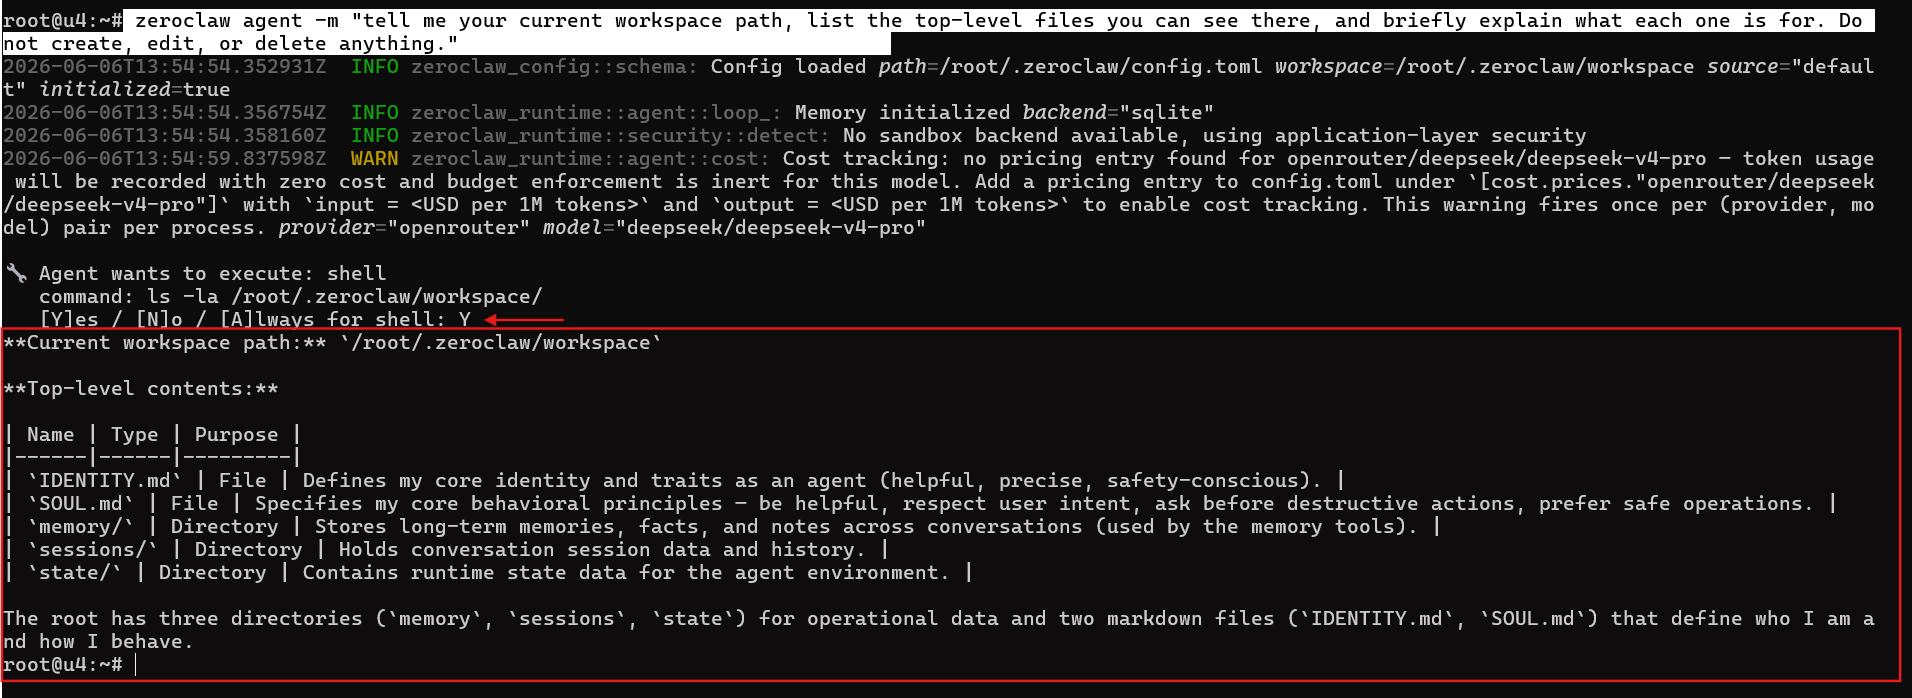
What to do next once ZeroClaw works

The right next move is not to turn on every feature you can find. It is to add one controlled layer at a time, so you always know which change introduced new risk or new friction.
💡 Tip: Once the first safe chat works, keep the same discipline for the next phase. Move to a safe repo copy or notes directory first, keep the tasks read-only where possible, and expand privileges only after the base workflow feels predictable.
Good follow-up tasks are boring on purpose: summarize a README, explain a configuration file, or list cleanup ideas without changing anything. That kind of work is high-signal because it uses the same runtime you just validated, but it does not force you into write access before you trust the tool. If you want a better first real workspace, use a safe repo copy, a staging notes directory, or a small internal docs folder rather than anything production-facing.
Good next steps, in order, look like this:
- point ZeroClaw at a safe repo copy or notes directory
- try one read-only helper task
- compare providers only after the base workflow feels stable
- look at services, channels, or Docker later as separate projects
If you want to compare providers later, do that after the base workflow is stable. If you want the next infrastructure step after CLI success, these are the commands worth knowing about:
zeroclaw service install
zeroclaw service start
zeroclaw service status
That is the point where this article should stop and the next topic should begin. Service management, Docker deployment, public gateways, messaging channels, and deeper security hardening deserve their own walkthroughs.
If this first smoke test was useful, an Ubuntu VPS from AlexHost is a natural place to keep experimenting with a lightweight agent runtime without turning day one into a full platform project. The right way to continue is outward, not sideways: use the official setup, service, provider, and security docs when you are ready for the next layer.
Conclusion: from curious to operational

The important result is not that ZeroClaw installed. The important result is that it answered safely from a verified first session on the VPS. That means the Ubuntu baseline checked out, the installer ran, “zeroclaw onboard” completed, the config and workspace were created, the health checks looked sane, and the first read-only reply came back grounded in real workspace context.
That is a meaningful stopping point. Keep your early experiments small, supervised, and observable, then expand one layer at a time toward services, harder security boundaries, or channel integrations when you actually need them. For a first Ubuntu VPS quickstart, controlled confidence is the win. You do not need to leave this article with a full automation stack. You need to leave it knowing the runtime works, the safety boundary is intact, and the next step is your choice instead of a guess.