How to Assign a Static Hostname to a Linux Machine
Assigning a static hostname to a Linux machine is essential for network identification and communication, especially in environments where multiple devices interact. The hostname serves as a human-readable label that distinguishes your machine on the network. Unlike dynamic hostnames, which may change based on configurations like DHCP, a static hostname remains constant, ensuring reliability in networking and access. This guide will walk you through the process of assigning a static hostname to your Linux system, covering various methods for different Linux distributions.
What is a Hostname?
A hostname is a label that identifies a device on a network. In Linux, it can either be static or dynamic, depending on the system configuration. The hostname is essential in various network-related tasks, like identifying the machine in SSH connections, DNS services, and in log files. A static hostname is crucial in environments where the machine needs to be recognized by a specific name, ensuring consistent access.
Checking the Current Hostname
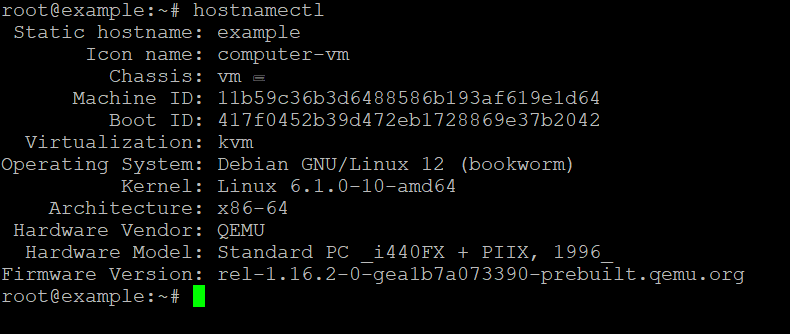
Before assigning a new hostname, it’s essential to check the current one. Use the following command to display the current hostname:

This command provides details about your system’s static hostname, transient (dynamic) hostname, and pretty hostname.
Changing the Hostname in Linux
To assign a static hostname, there are different methods depending on the distribution of Linux you are using. Let’s break it down into two main categories: systemd-based distributions (most modern distributions like Ubuntu, CentOS 7+, Fedora) and non-systemd distributions (older or specific distributions).
Method 1: Using hostnamectl Command (For systemd-based distributions)
For most modern Linux distributions that use systemd, the process is relatively straightforward using the hostnamectl command.
- Open Terminal: Open the terminal on your machine.
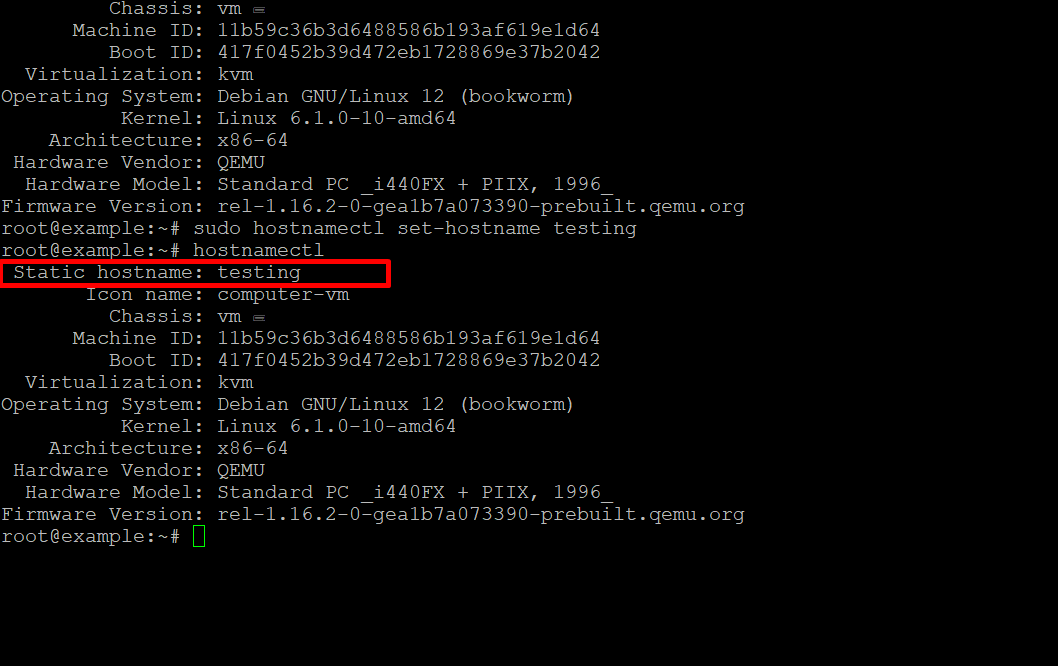
- Assign the New Hostname: To set a static hostname, use the following command:
Replace
with the desired hostname for your machine.new-static-hostname - Verify the Change: After executing the command, check if the new hostname has been applied by running:
The
field should reflect the change.Static hostname

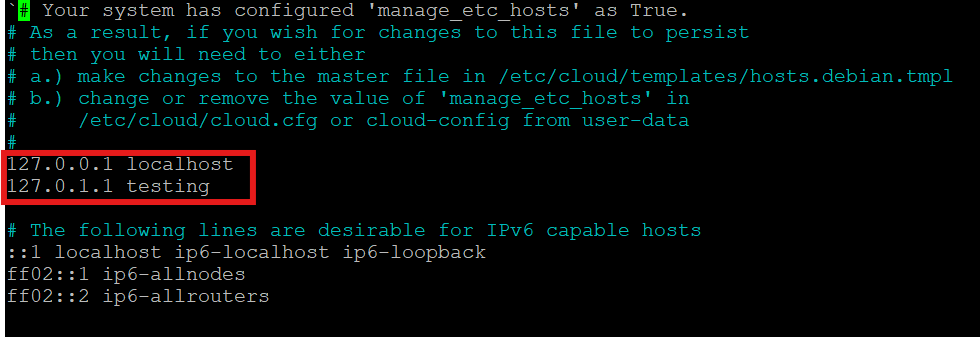
- Update the /etc/hosts File: After setting the hostname, ensure you update the /etc/hosts file. This file maps IP addresses to hostnames. Open it using a text editor (e.g., nano or vim):
Find the line that references your old hostname (usually associated with 127.0.0.1), and replace the old hostname with the new one. It should look something like this:
Save the file and exit the editor.

Method 2: Manually Editing the /etc/hostname File (For non-systemd distributions)
If you are using an older Linux distribution or one that does not rely on systemd, the process involves manually editing configuration files.
- Open the /etc/hostname File: Use your preferred text editor to open the /etc/hostname file. For example, using nano:
- Modify the Hostname: Replace the current hostname with the new static hostname of your choice. After editing, save the file and exit the editor.
- Update the /etc/hosts File: Similar to the systemd-based method, you should also update the /etc/hosts file to reflect the new hostname:
Modify the relevant lines to include the new hostname. For example:
- Reboot or Reload the Hostname: For the changes to take effect, you can either reboot your system or restart the hostname service:
Alternatively, without rebooting, you can reload the hostname with:
Persisting Hostname Changes
In most cases, the hostname changes you make will persist after a reboot, especially when using hostnamectl or editing /etc/hostname. However, in environments where DHCP assigns a hostname dynamically, additional configuration may be required to prevent DHCP from overriding your static hostname.
To avoid this, ensure your DHCP client configuration does not request or overwrite the hostname. For systems using dhclient, you can modify the DHCP configuration in /etc/dhcp/dhclient.conf by adding:
This ensures that your machine uses the specified hostname instead of the one provided by the DHCP server.


